
Splunk SIEM Installation Guide
Prerequisites
Compatibility Matrix
- Browser: Google Chrome, Mozilla Firefox.
- OS: Platform independent.
- Splunk Enterprise version: 10.2.x, 10.0.x, 9.4.x and 9.3.x.
- Supported Splunk Deployment: Splunk Cluster, Splunk Standalone, and Distributed Deployment.
Installation Instructions
The Add-on can be installed in any of the following ways
New Installation - Single Server - via Splunkbase
Note: The Splunk server requires internet access for this App installation method.
- Go to Apps > Manage Apps > Browse more apps
- Search for "GreyNoise" and from the list select "GreyNoise".
New Installation - via File Upload
- Download the Add-on from Splunkbase.
- Through the Splunk user interface from Apps > Manage Apps > Install app from file.
- Upload the GreyNoise v3.0.2 file.
New Installation - via Terminal
- Download the Add-on from Splunkbase.
- By extracting the compressed file (.tar.gz) into the $SPLUNK_HOME$/etc/apps folder.
New Installation - with a Cluster Environment
- To learn more, please refer to this Splunk Document
Upgrading from an Existing Version
To upgrade the existing version to GreyNoise v3.0.2, follow the steps below:
Manual Upgrade via the Splunk UI
- Navigate to Apps -> Manage Apps.
- Click Install app from file.
- Click Choose file and select the GreyNoise v3.0.1 installation file.
- Check the Upgrade checkbox.
- Click on Upload.
- Restart Splunk when prompted.
Manual Upgrade via Splunkbase
- Navigate to Apps > Manage Apps.
- Search for "GreyNoise".
- Under the version column, click on the "Update to 3.0.1".
- Provide the valid creds and restart Splunk when prompted.
Additional Upgrade Steps from v2.x to v3.x
GreyNoise App for Splunk v3.0.x contains KV lookups instead of CSV lookups. Once you upgrade the GreyNoise app to v3.0.x from a 2.x version, follow the steps below to migrate the CSV lookups to KV lookups:
- Navigate to the Splunk UI > Settings > Searches, Reports, and Alerts.
- Select "GreyNoise App for Splunk (SA-GreyNoise)" under app dropdown and "All" under owner dropdown.
- Search for "greynoise_migrate" in the filter. It will display three searches.
- Click on "Run" against all three of the searches.
Make sure to enable the "Purge Cache" option under "Caching" for the first scan deployment. It will clear the cache, which contains older fields such as 'riot' and 'noise'.
Application Configuration
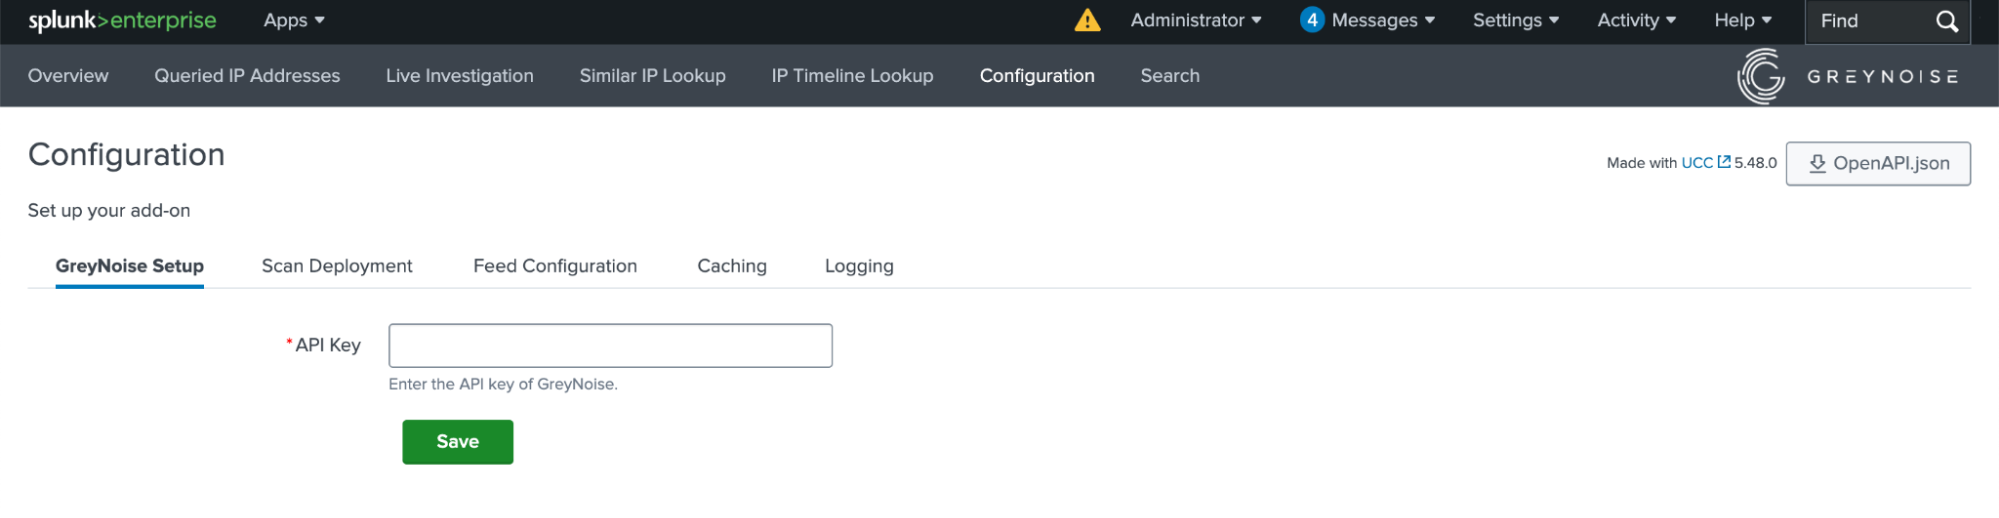
API Key Configuration
The app requires a GreyNoise API key before any functionality is available. To configure the API key for the app, follow these steps:
- Navigate to the 'GreyNoise App for Splunk > Configuration'.
- Under the GreyNoise Setup tab, add the API key.
Using Risk Scores within Splunk Enterprise Security
To update the risk score against the classification of the GreyNoise scan result, follow the steps below:
- From the Splunk UI, navigate to the GreyNoise > Configuration.
- Navigate to the Scan Deployment tab.
- Check the Update Risk Score to Splunk ES checkbox.
- Provide the desired risk score against each classification.
- Save the settings.
To analyze the risk score in Splunk ES:
-
From the Splunk UI, navigate to the Enterprise Security app.
-
Navigate to the Analytics > Security intelligence > Risk analysis.
-
Adjust the filters as required and check the panels.

Configuring the GreyNoise Feed
To ingest a GreyNoise feed of indicators into the greynoise_indicators lookup table, follow these steps:
- Navigate to the Splunk UI > GreyNoise App for Splunk > Configuration > Feed Configuration.
- Select the Enable Feed Import option
- Optionally, select the Force Feed Run Now option to immediately run the job, instead of waiting for the daily schedule
- Select which feed to import from the Feed Selection drop-down
- Click Save
The feed will now download once per day into the greynoise_indicators lookup table.
Capability to ingest GreyNoise feed data into a Splunk Index
As of version 3.0.0, the app includes the capability to ingest GreyNoise feed data into the Splunk index along with the KV lookup. The indexed data will contain all indicator information.
To enable the indexing of the indicator data, follow the steps below:
- Navigate to the Splunk UI > GreyNoise App for Splunk > Configuration > Feed Configuration.
- Check the Ingest Feed To Index box.
- Select the desired Index from the dropdown.
- Once saved, the next collection of Feed data will be ingested into Splunk.
CIM (Common Information Model) Mapping
As of version 3.0.0, the app includes data mapping to the Splunk CIM. The indicator data is mapped with the following CIM models:
- Network Traffic
- Vulnerabilities
Support for Splunk ES - Threat Intelligence
The GreyNoise App for Splunk integrates with Enterprise Security Threat Intelligence.
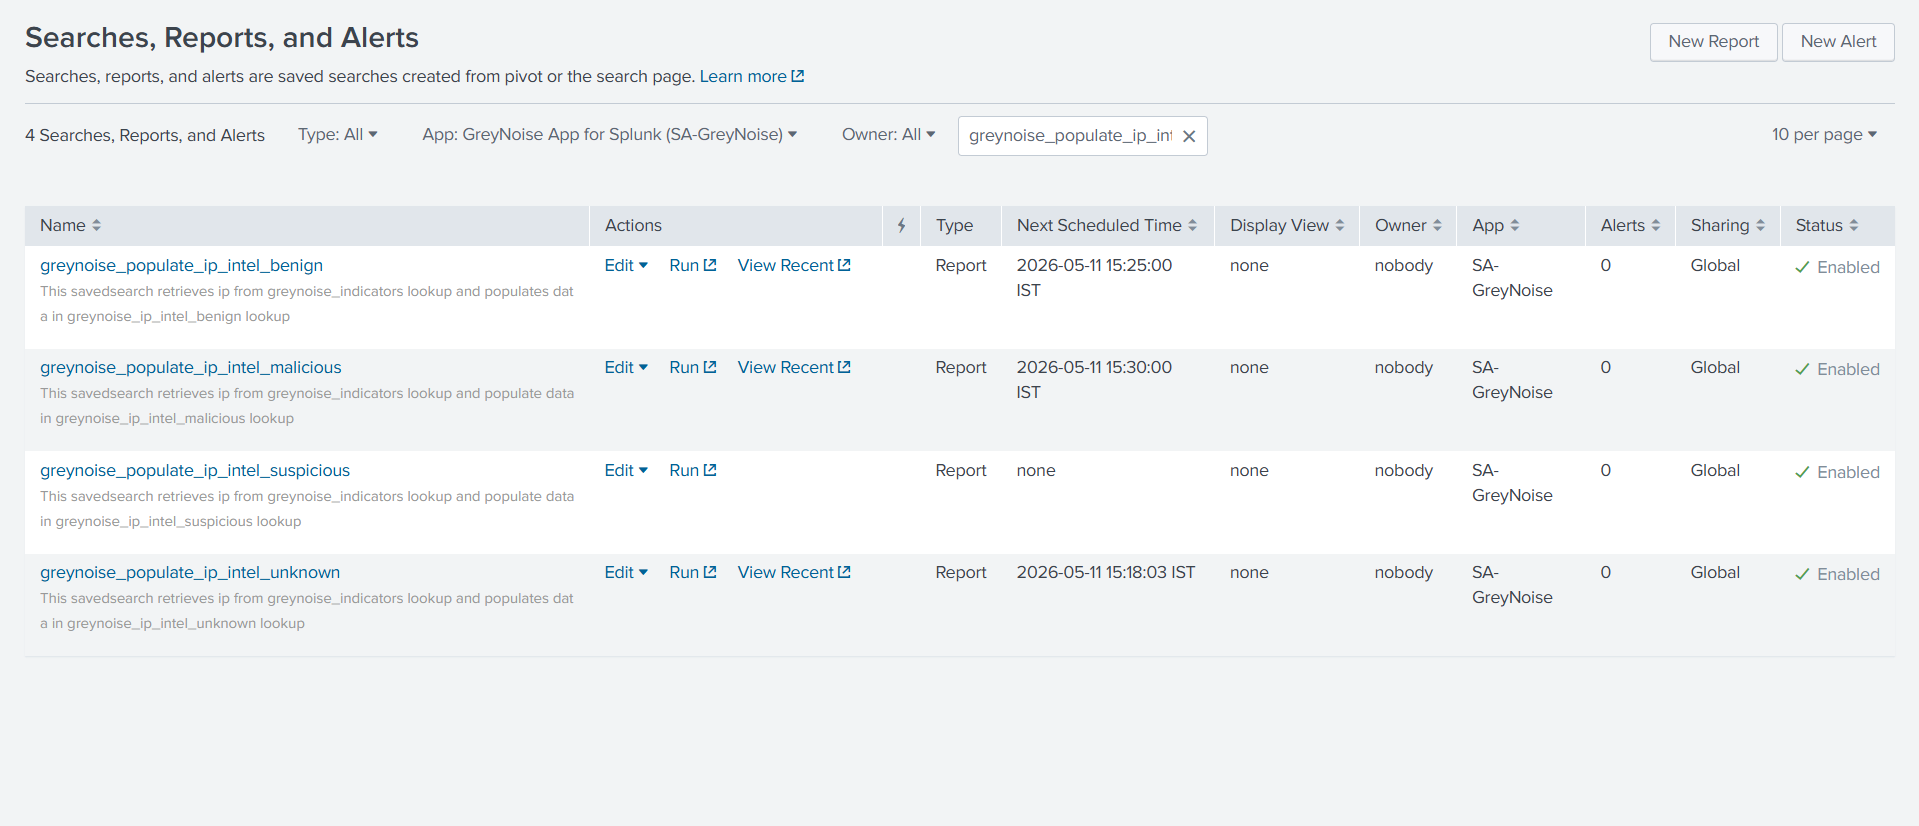
To add GreyNoise indicator data in Splunk ES, follow the steps below:
- Navigate to the Splunk UI > Settings > Searches, Reports, and Alerts.
- Select the GreyNoise App for Splunk (SA-GreyNoise) option under the App dropdown and "All" under the owner dropdown.
- Search for "greynoise_populate" in the filter. It will display four searches:
- greynoise_populate_ip_intel_benign
- greynoise_populate_ip_intel_malicious
- greynoise_populate_ip_intel_suspicious
- greynoise_populate_ip_intel_unknown
- To apply the required classification, click Edit > Enable.
On Splunk Enterprise Security (ES)
- Navigate to Apps > Enterprise Security.
- From the navigation bar, navigate to Configuration > Threat intelligence.
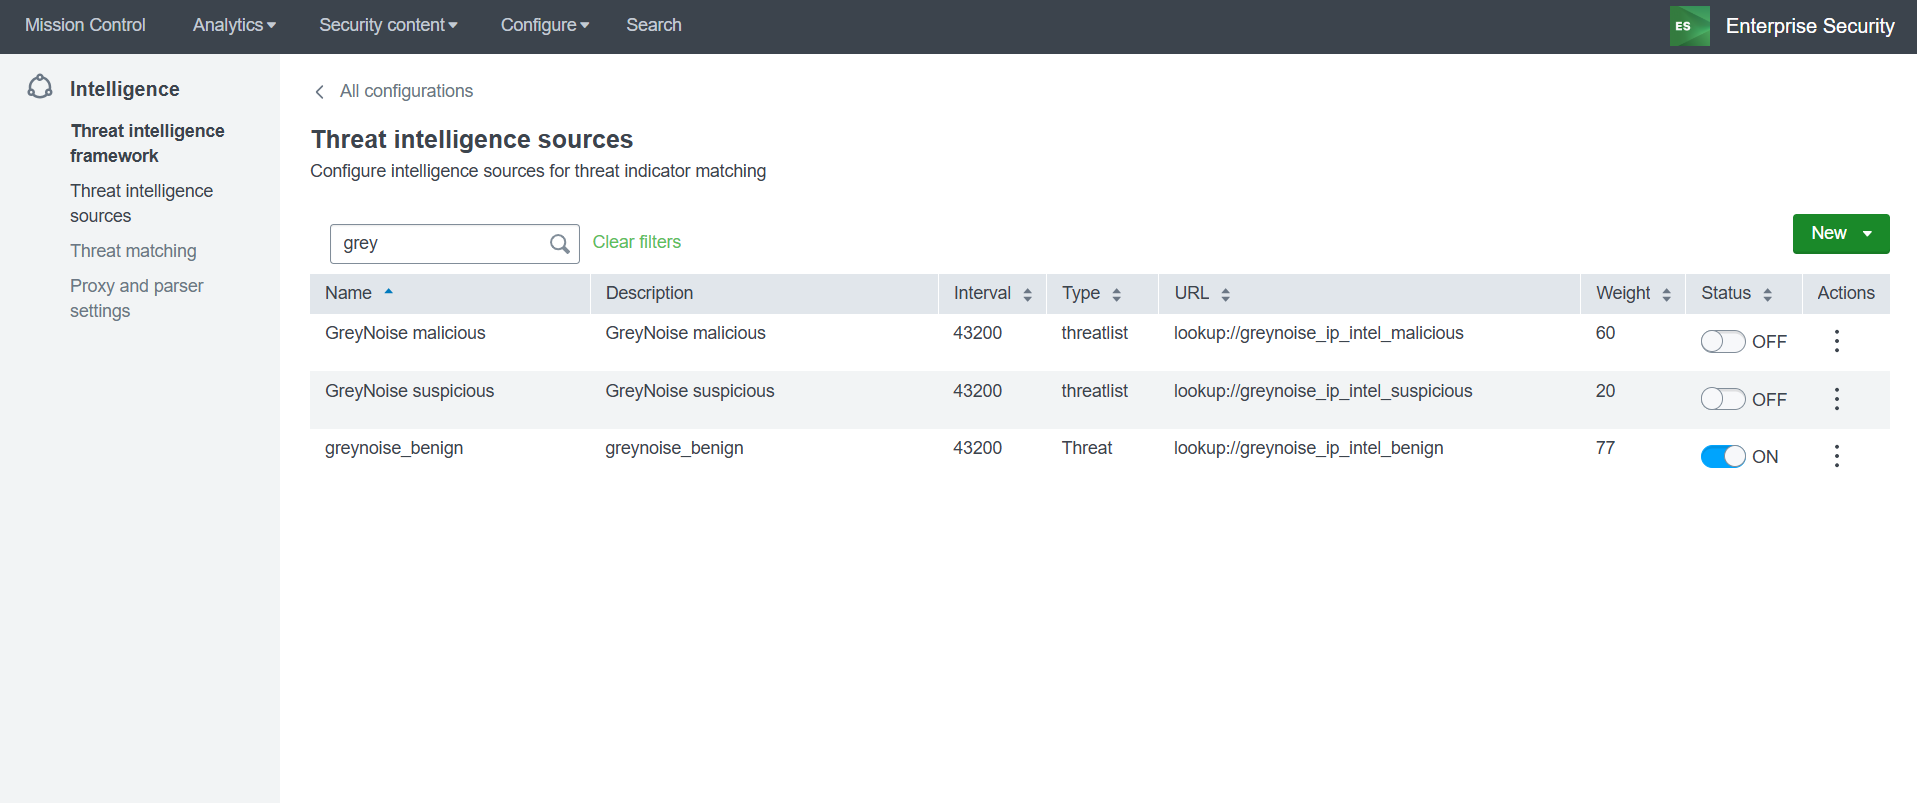
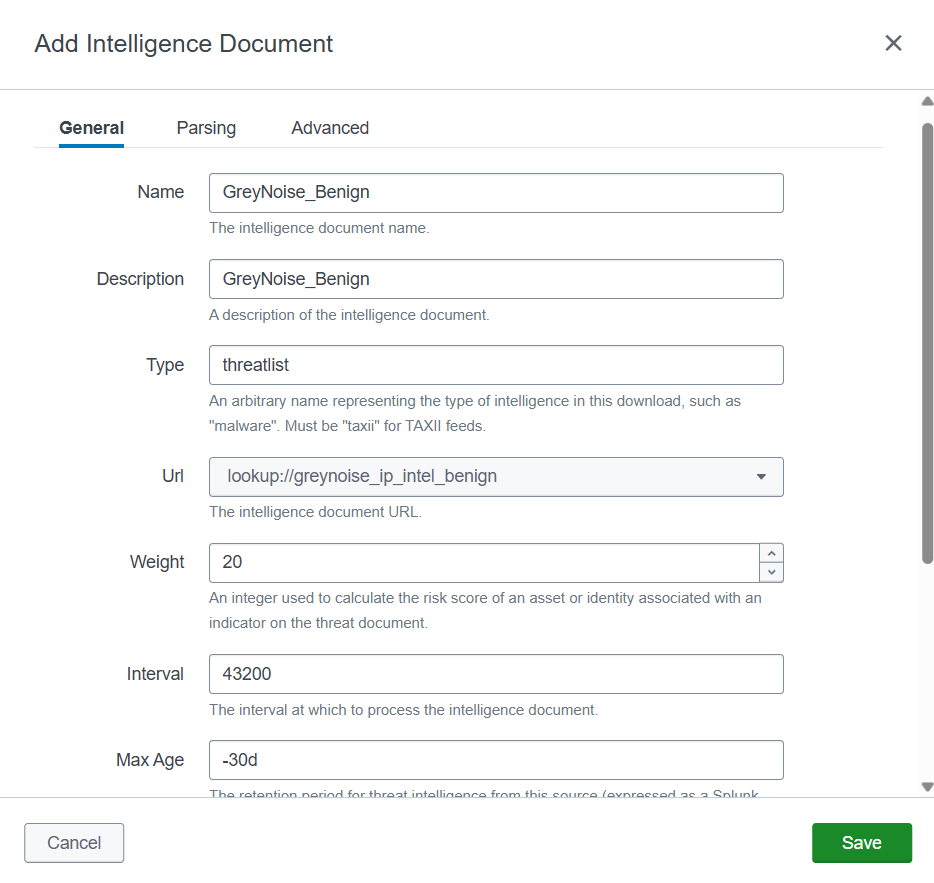
- Click on New > Local.
- Fill out all the mandatory fields in the form.
- For the Type field, enter "threatlist".
- For the URL field, select the appropriate URL name from the list below:
- lookup://greynoise_ip_intel_benign
- lookup://greynoise_ip_intel_malicious
- lookup://greynoise_ip_intel_suspicious
- lookup://greynoise_ip_intel_unknown
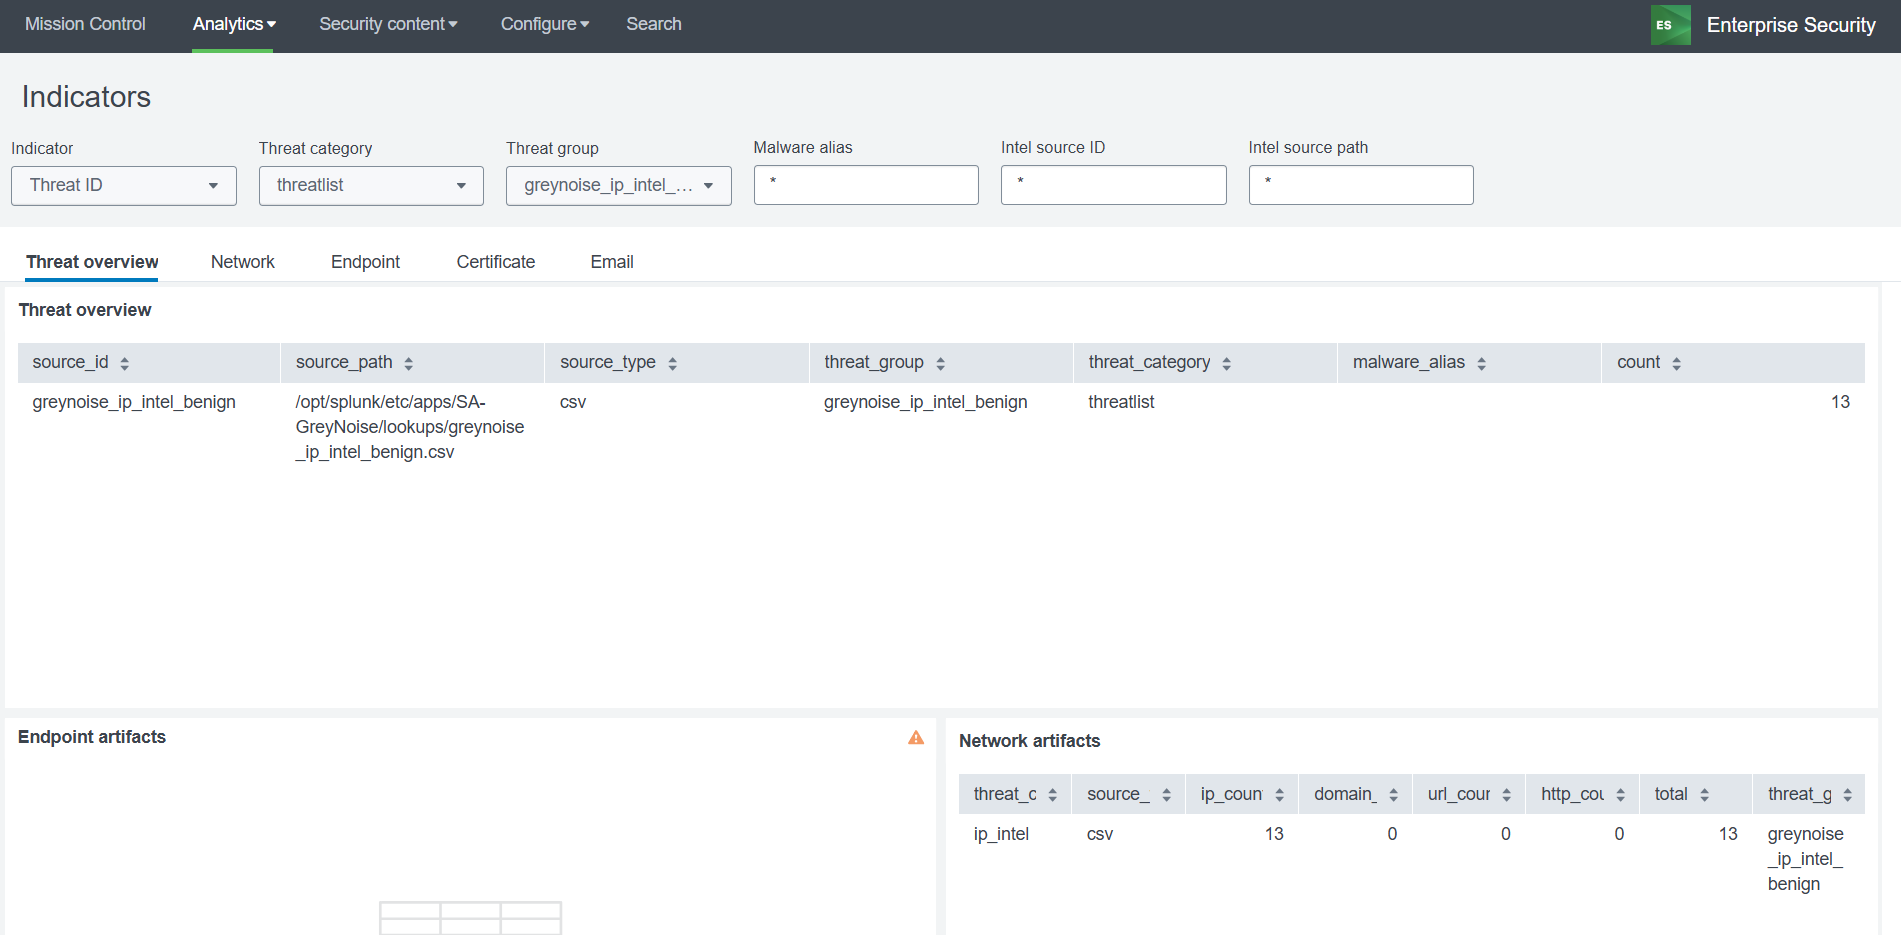
- The lookup data can be viewed under Analytics > Security intelligence > Threat intelligence > Indicators.
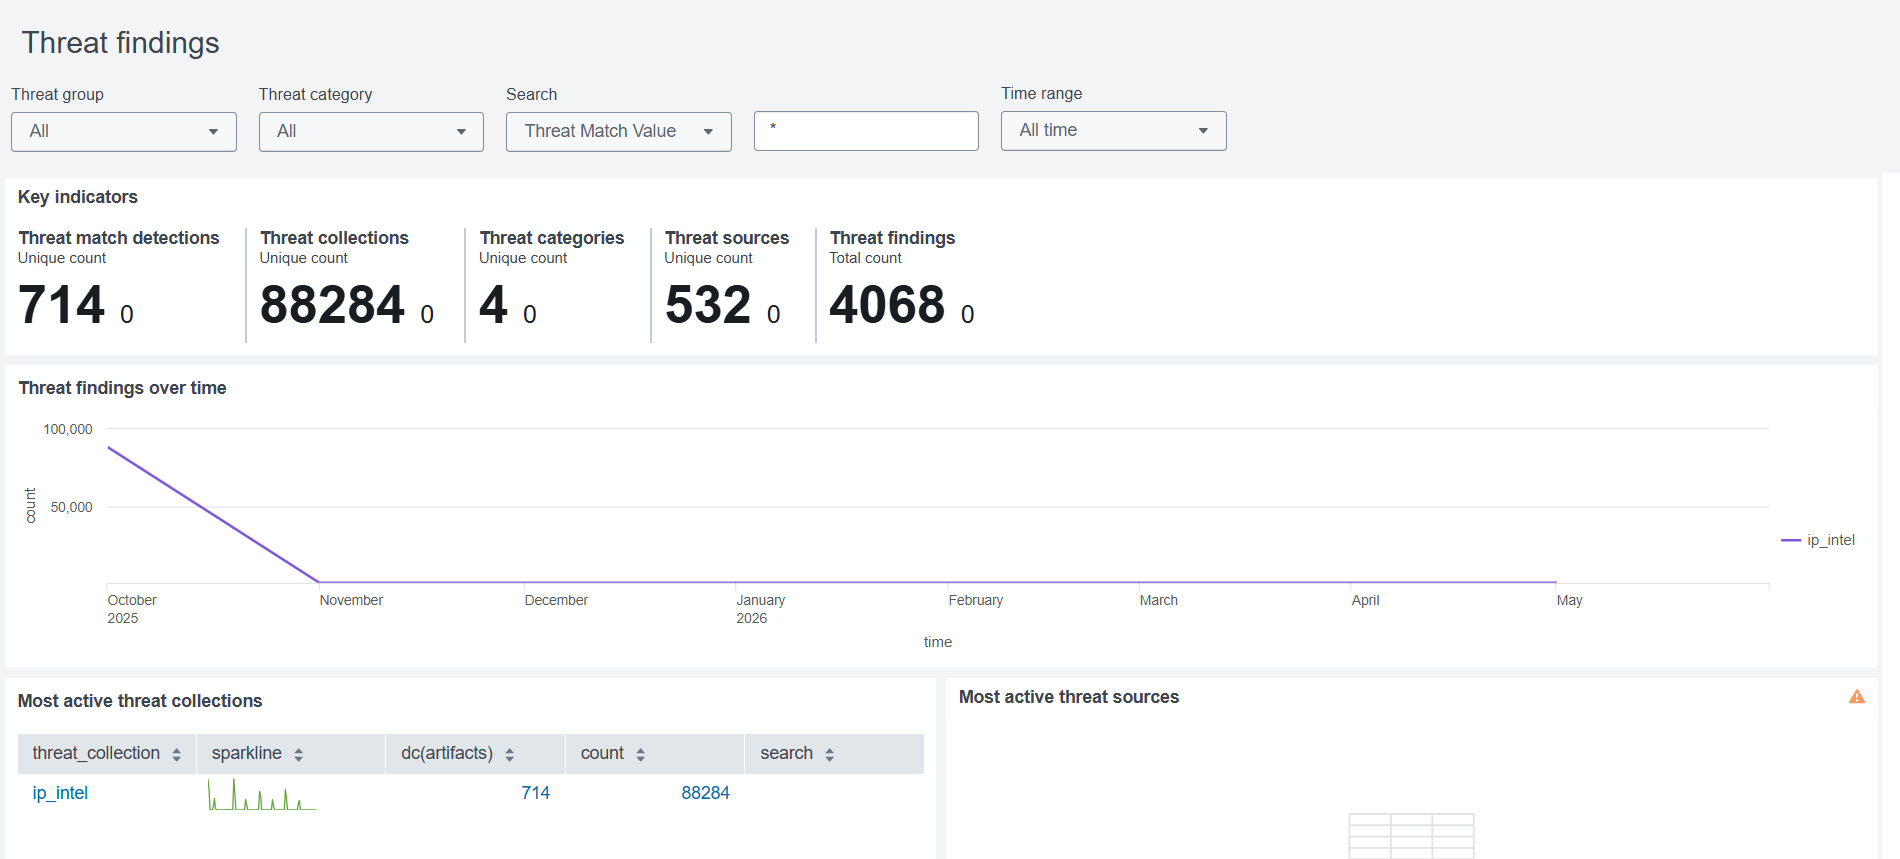
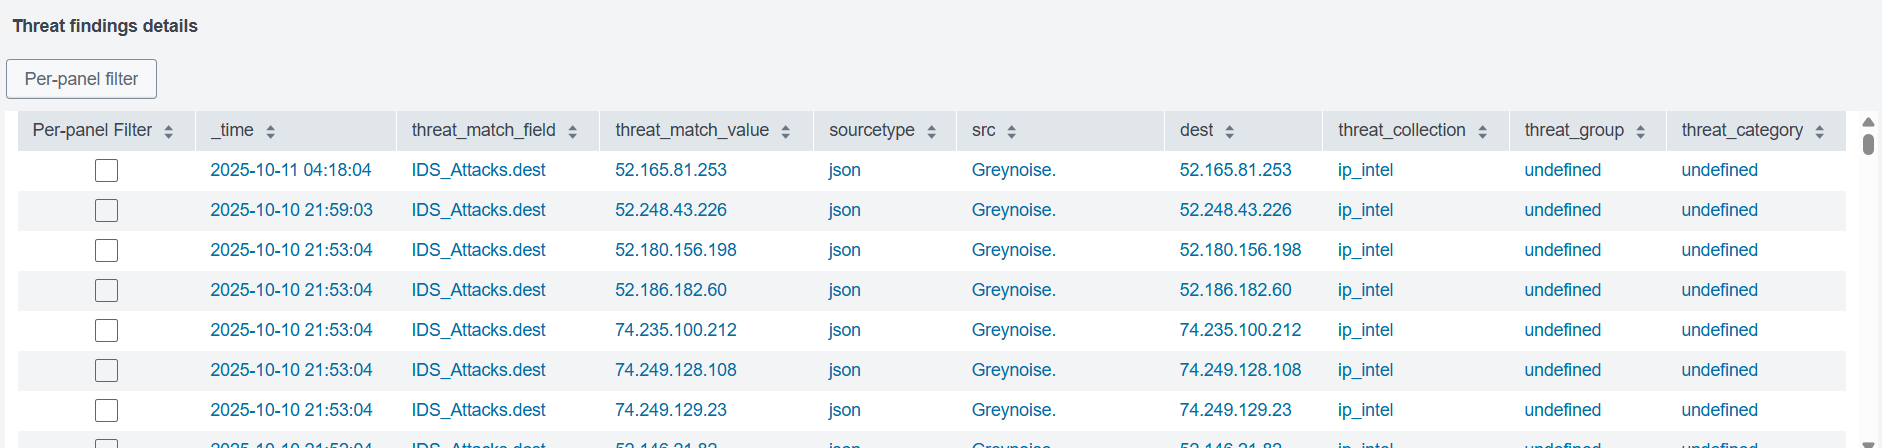
- The findings against the indicators can be reviewed under Analytics > Security intelligence > Threat intelligence > Findings (Threat Findings).
Changelog
Changes in v3.0.2
- Fixed connection failures on RHEL systems caused by IPv6 resolution issues
- Fixed Live Investigation Dashboard
Changes in v3.0.1
- Fixed Python file formatting
Changes in v3.0.0
- Implemented CIM (Common Information Model) mapping for better data normalization and integration with Splunk ES.
- Introduced support to update the Risk Score in Splunk Enterprise Security (ES) based on classification.
- Added capability to ingest GreyNoise feed data into a Splunk index.
- Added support for Splunk ES - Threat Intelligence.
- Updated the IP Timeline Lookup dashboard with new filters.
- Updated GreyNoise SDK to use v3.0.1.
- Migrated the app to the latest version of Splunk Add-on Builder v4.5.0.
- Removed the commands
gnipsimilarandgnriot. - Removed the Similar IP Lookup dashboard.
Updated about 1 month ago