
Sensor Installation Guide
The following provides a basic overview of how to perform an installation of a GreyNoise Sensor on a Customer Hosted device.
Pre-Install
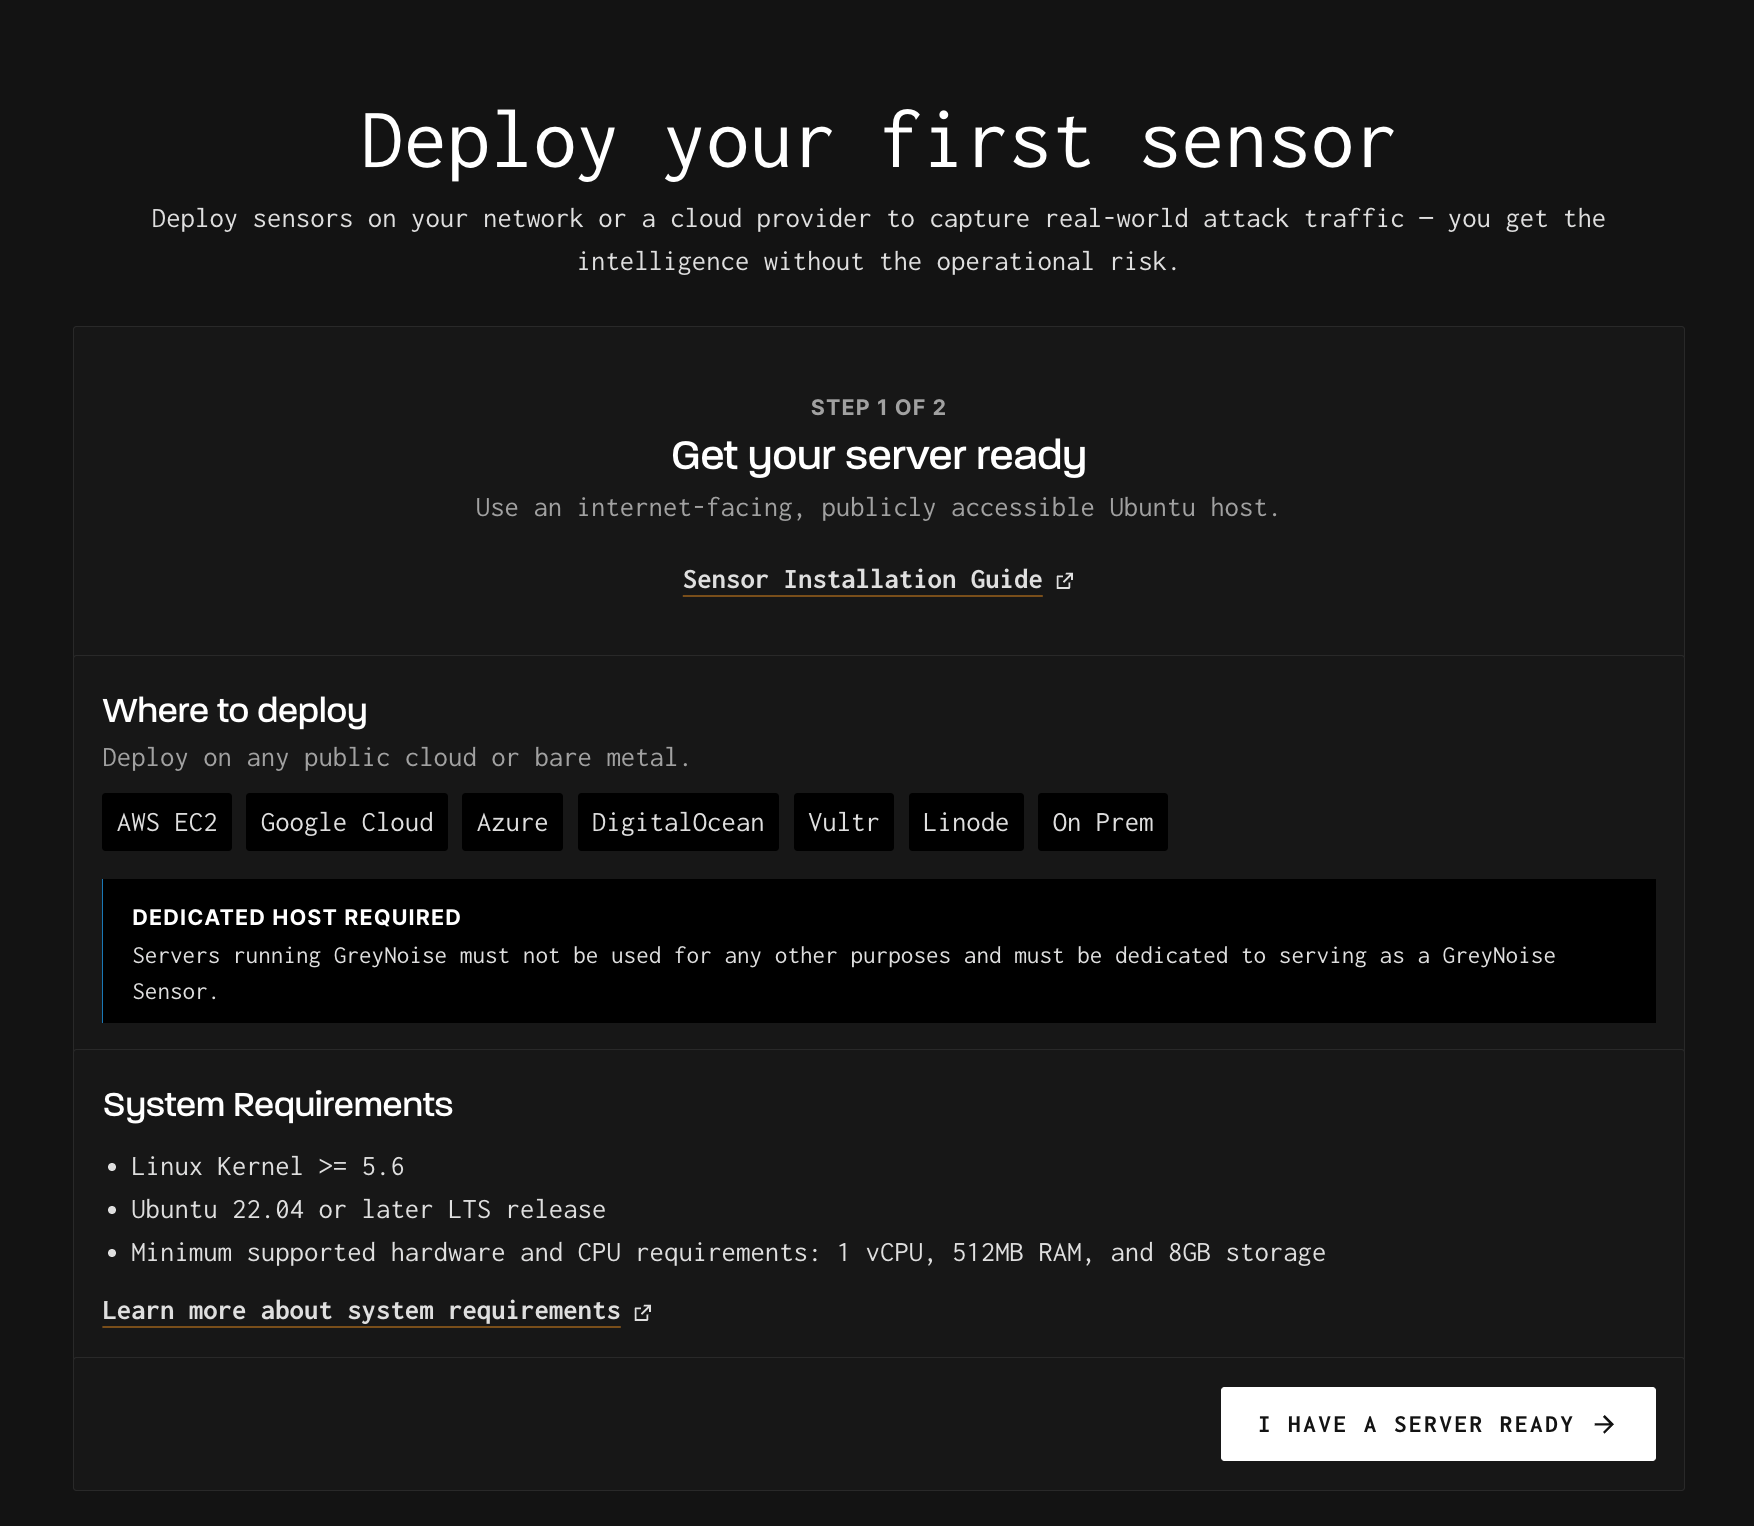
System Requirements
- An internet-facing Linux box running a supported operating system:
- Linux Kernel >= 5.6
- Ubuntu 22.04, Ubuntu 24.04, Debian 13
- Minimum supported hardware and CPU requirements:
- 1 vCPU, 512MB RAM, and 8GB storage
- Root-level access
- A public IP address
- This host must not be used for any other purposes and dedicated to serving as a GreyNoise Sensor. All traffic will be forwarded to the GreyNoise Cloud using a Wireguard tunnel, where our backend will handle making the sensor ‘look’ like the deception profile you assign to your sensor.
- By default, the SSH port will be changed to a non-standard SSH port. You can only SSH into the sensor via the installation's configured SSH Management Port.
- The installer checks whether ports 80 or 443 are already in use and will abort if another service is bound to them. Stop or remove any existing web servers or other listeners before installing.
- We recommend using infrastructure that can be easily destroyed/rebuilt.
Static IP RequiredWe rely on a stable, static IP address to be assigned to each Sensor for the life of that sensor. If your sensor is using a DHCP-provided IP address from your provider, e.g. an ISP, the Greygent will handle remapping your IP automatically when it changes.
Prerequisites
The sensor establishes an encrypted WireGuard tunnel to the GreyNoise Cloud. Your firewall must permit the following outbound traffic from the sensor:
| Direction | Protocol | Port | Destination | Purpose |
|---|---|---|---|---|
| Outbound | UDP | 45000 | GreyNoise gateway | WireGuard tunnel (required) |
| Outbound | UDP | 25000 | GreyNoise gateway | Hardware-profile tunnel (only if a hardware profile is assigned) |
| Outbound | TCP | 443 | api.greynoise.io | Bootstrap, registration, health reporting |
| Outbound | UDP/TCP | 53 | Your DNS resolver | Name resolution (see DNS note) |
The tunnel is keepalive-based (every 25 seconds); ensure stateful firewalls do not prematurely expire the UDP flow.
Unique Environment Requirements
Google GCP
When installing a GreyNoise Sensor on a Google GCP system, an additional pre-installation step is required. Before running the sensor installation script, ensure that the /etc/hosts file contains an entry for 127.0.0.1 localhost. This is not included by default and can cause unexpected behavior with the system after the sensor installation script is executed.
Public IP Considerations
The installation process should work out of the box in most scenarios. However, in some scenarios, the public IP(s) associated with a sensor will need to be provided with the -p flag:
- When multiple IPs are associated with the sensor
- When the IP(s) are not the default route to the internet (we test using 8.8.8.8)
If either of these applies, use the -p flag with a comma-separated list of IPs or CIDRs for the sensors.
Installing the Sensor
Provision Server FirstBefore continuing with sensor installation, ensure you have SSH access to the host that you will use as your sensor.
Ensure Sensor access on GreyNoise Visualizer
Log in to the GreyNoise Visualizer and navigate to Observe --> Sensors.

Is the Sensor tab missing?If you don’t see the sensors tab, try logging out and back in. If you still can’t see it, you may not have been provisioned correctly for early access. Contact [email protected] if you are an early access participant that cannot see your sensors.
Obtain your unique sensor installation command by clicking I have a sensor ready in the Visualizer, which is visible if this is your first sensor installation.
Your installation command will look like this:
GREYNOISE_API_KEY=<your API key> && curl -H "key: ${GREYNOISE_API_KEY}" -L https://api.greynoise.io/v1/workspaces/<your workspace ID>/sensors/bootstrap/script | sudo bash -s -- -k ${GREYNOISE_API_KEY}SSH into your sensor, copy and paste the sensor installation command from the sensor management screen into your terminal, and run the command as a user with superuser permissions.

Running the sensor installation command in the terminal
The Installation should proceed with your session on the host being terminated at the end of the installation. 🎉
Return to the Visualizer Sensors Page to see your new sensor.

Sensors Page With Sensor
SSH Port ChangeOnce installation is complete, you will be logged out of your existing SSH session. You will be able to SSH back into your sensor with the new SSH management port configured post-installation. By default the port is randomly generated and provided in the output of the script. This can be customized during the installation.
Example connection with customer port:
ssh -p 3822 ubuntu@mysensorip
Customized Installation Using Optional Parameters
In some environments, customization of the installation may be required. If you find that the default installation command does not work or you wish to set your own SSH port, see the following list of parameters supported by the sensor installation script:
-i <ip_address>- used to define the internal IP address the system uses for outbound network connections. This should only be needed if the IP address used to connect to the internet is not easily discoverable.-p <ip_address>- used to provide the public IP address that the GreyNoise Cloud will use to communicate with the sensor. See [Public IP Considerations] for details on when this should be used.-s <SSH management port>- used to provide the desired SSH management port instead of the randomly generated one provided by the script. Once the installation is complete, you will use this port to SSH into your sensor.-n <interface name>- used to set the interface used for publicly routable ingress/egress traffic, e.g.eth0By default, the script attempts to determine the interface based on the default route.-g <ip_address>- used to define the gateway IP for traffic. It is only needed if sensor response traffic should be sent via a different route than the usual route to access the internet.-m <mtu>- used to set the MTU used for the primary network interface. This should not need to be changed in most situations.-t- used to indicate that the traffic received by the system is DNATed (that is, the internal IP address will not match the public IP address). This is auto-detected based on whether the primary route's IP address is in the RFC 1918 space, and as such, should not need to be manually specified in most situations.-d <ip>- used to provide a custom DNS resolver (defaults to 8.8.8.8).-a <ip>- used to set an SNAT address for outbound traffic. Required if the host has more than one internal IP.-o <name>- used to set the Sensor display name shown in the Visualizer.
Here is an example of running the sensor installation script with custom parameters:
# Set your GreyNoise Workspace ID
# You can retrieve this by clicking on your user name in the Visualizer menu
# and selecting 'API Key'
export GREYNOISE_WORKSPACE=<your workspace ID>

# Set your API key for future commands
export GREYNOISE_API_KEY=<your api key>

# Download the installation script
curl -H "key: $GREYNOISE_API_KEY" -L
https://api.greynoise.io/v1/workspaces/$GREYNOISE_WORKSPACE/sensors/bootstrap/script > bootstrap.sh

# Make the script executable
chmod 755 ./bootstrap.sh

# Run the script
./bootstrap.sh -i 123.124.125.126 -s 3822 -n eth4
Post Installation
Once you have successfully installed a sensor, the sensor will be running the GreyNoise Default profile, which is not listening on any ports but will respond to pings and send transport protocol rejection packets. When you are ready for the sensor to start collecting data, ensure that you select one of the device profiles and apply it to the sensor, allowing it to capture additional traffic and scanning attempts.
Troubleshooting
For any issues, please feel free to contact [email protected] for assistance.
Check Your Firewall SettingsThe firewall on your server must permit traffic on the ports that the profile requires to be open. We recommend allowing all ports for maximum visibility into activity on your sensor.
FAQ
- Why am I unable to SSH into my sensor host after I installed the GreyNoise sensor?
- Once the GreyNoise sensor is installed, your SSH port will be changed. The port is updated when the script runs, and the new port is provided as an output to the script. If you missed it during the installation, you can find it on the Sensor Details Page for your sensor.
- Why does my sensor show the wrong IP address in the Visualizer?
- On some hosts, the public IP address can not be automatically detected during installation. If this is the case for your host, please use either the
-ior-pparameter with the sensor installation script and redo the installation.- See Sensor Installation > Customized Installation Using Optional Parameters for more information.
- On some hosts, the public IP address can not be automatically detected during installation. If this is the case for your host, please use either the
Updated about 2 months ago