
SIEM Integration Overview: Splunk
Install From SplunkBase
Navigate to the GreyNoise App on Splunkbase and download the GreyNoise TA.
COMPATIBILITY MATRIX
- Splunk Enterprise version: 10.0.x, 9.4.x, and 9.3.x
- OS: Platform independent
- Vendor Products: GreyNoise API
RELEASE NOTES (VERSION 3.0.0
- Implemented CIM (Common Information Model) mapping for better data normalization and integration with Splunk ES
- Introduced support to update the Risk Score in Splunk Enterprise Security (ES) based on classification
- Added the capability to ingest GreyNoise feed data into a Splunk index
- Added support for Splunk ES Threat Intelligence
- Updated the IP Timeline Lookup dashboard with new filters
- Updated the GreyNoise SDK to version 3.0.1
- Migrated the app to the latest version of Splunk Add-on Builder (v4.5.0)
- Removed the commands gnipsimilar and gnriot
- Removed the Similar IP Lookup dashboard
Release Notes for Previous Versions can be found HERE
Topology and Setting Up Splunk Environment
Standalone Mode
- Install GreyNoise App for Splunk. See the INSTALLATION section for more details.
- Configure the API key and log level. See the CONFIGURATION section for details.
Search Head Cluster
- In case of Search Head Clustering, make sure that the GreyNoise Setup and Scan Deployment is configured on only a single search head. In such cases, the configuration will not be visible on other search heads. If a user wants to configure Logging (default is INFO), the user can configure it individually on every search head (recommended).
- If user wants to replicate the configuration settings, follow these steps:
- On search head deployer, extract the app at $SPLUNK_HOME$/etc/shcluster/apps.
- Create stanza shclustering at path $SPLUNK_HOME$/etc/shcluster/apps/app-greynoise/local/server.conf and add following information to the stanza: conf_replication_include.app_greynoise_settings = true
- Push the bundle to search head.
- Configure the API key and log level. See the CONFIGURATION section for details. Following these steps will replicate the configuration on all search heads.
Permissions
Configuration can only be done by admin but other custom commands can be used by admin and the users with list_storage_passwords capability.
Installation
Follow the below-listed steps to install an app from the bundle:
- Download the App package.
- From the UI navigate to Apps > Manage Apps.
- In the top right corner select Install app from file.
- Select Choose File and select the App package.
- Select Upload and follow the prompts.
- Restart the Splunk to complete the installation.
Note: This app contains Adaptive Response Actions, which can be used along with Splunk Enterprise Security. To use these alert actions on the Splunk instance without Splunk Enterprise Security, kindly install Splunk Common Information Model (CIM).
UPGRADING FROM VERSION 2.x.x to 3.x.x
GreyNoise App for Splunk v3.0.0 contains KV lookups instead of CSV lookups. Once you upgrade the GreyNoise app to v3.0.0, follow the steps below to migrate the CSV lookups to KV lookups:
- Navigate to the Splunk UI > Settings > Searches, reports, and alerts
- Select “GreyNoise App for Splunk (SA-GreyNoise)” under app dropdown and “All” under owner dropdown.
- Search for “greynoise_migrate” in the filter. It will display three searches.
- Click on “Run” against all three of the searches.
- Enable the “Purge Cache” option under “Caching” for the first scan deployment. It will clear the cache containing older fields such as riot and noise.
Configure GreyNoise Integration Instance
Configuration
The app can be configured in the following way:
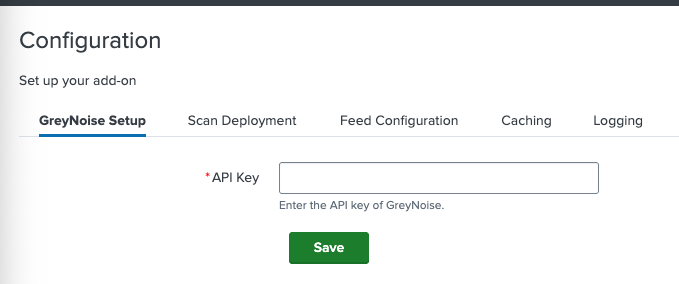
- From the Splunk UI, navigate to Apps > GreyNoise App for Splunk > Configuration.
- Click on GreyNoise Setup and enter the API Key.
- Click on the Save button.
- The app is now configured, and all the features (except Scan Deployment) are ready to be used.
Logging
Users can configure the log level by navigating to Apps > GreyNoise App for Splunk > Configuration and selecting Logging.
Caching
This feature helps users to enable/disable caching for all the custom commands and saved searches. It can be configured in the
following way:
- From the Splunk UI, navigate to
Apps > GreyNoise App for Splunk > Configuration. - Click on Caching.
- Enter the following details to set up the Caching:
- Enable caching: Checkbox to enable caching for all custom commands and savedsearches.
- Time to live: Time period (in hours) to configure the cache’s time to live. Responses with age greater than the TTL, will be removed from the cache by a savedsearch which will run every hour.
- Purge Cache: Checkbox to purge the cache of all responses.
Proxy Support
To enable proxy support, modify the app_greynoise_settings.conf and add a proxy entry to the parameters section.
Example:
[parameters]
proxy = http://proxy.acme.com:8080
Scan Deployment
This feature helps users to scan the Splunk Deployment and identify the noise IP addresses from it. It can be configured in the following way:
- From the Splunk UI navigate to Apps > GreyNoise App for Splunk > Configuration.
- Click on Scan Deployment.
- Enter the following details to set up the Scan Deployment:
- Indexes: Indexes to be scanned in the deployment.
- CIM Fields: CIM fields containing IP address to scan for noise status.
- Other Fields: Other comma(,) separated fields containing IP address to scan for noise status.
- Scan Start Time: Time range for scanning the indexed Splunk data.
- Enable Scan Deployment: Checkbox to enable or disable scanning of the deployment.
- Force Scan Deployment: This is useful when the user wants to override the current running scan immediately and start a new one.

Feed
This feature allows users to ingest GreyNoise indicators into a lookup table to be used within the Splunk environment :
- From the Splunk UI navigate to Apps > GreyNoise App for Splunk > Configuration.
- Click on Feed Configuration tab.
- Enter the following details to set up the Feed:
- Enable Feed Import: turns the feature on to enable the daily ingest of GreyNoise indicators via feed
- Force Feed Run Now: starts a manual run of the feed import, rather than waiting for the daily scheduled run
- Feed Selection: select the appropriate option to choose which type of feed to ingest into the system
Ensure your subscription includes a Feed license before enabling.
On-Demand Commands
The following commands are included as a part of the app:
gnip
Search format:
| gnip ip="(ip_address)"
Purpose: Retrieves context information for a given IP address from the GreyNoise.
gnquick
Search format:
| gnquick ip="(ip_address),(ip_address),(ip_address)"
SPL_QUERY | gnquick ip_field="(ip_field)"
Purpose: Retrieve the noise status of all the IP addresses as separate events[OR] Retrieve the noise status for all the given IPs returned by the SPL_QUERY for specified ip_field.
gnquery
Search format:
| gnquery query="(GNQL_query)" result_size="(result_size)"
Purpose: Retrieve the results of the given GNQL query from GreyNoise. result_size denotes the number of results to be retrieved which is capped at 50,000. result_size is an optional parameter with a default value of 50,000.
gnstats
Search format:
| gnstats query="(GNQL_query)" count="(stats_count)"
Purpose: Fetch the aggregate statistics for the top organizations, actors, tags, ASNs, countries, classifications, and operating systems of all the results for a given GNQL query. count denotes the number of stats to be retrieved.count is an optional parameter.
gnmulti
Search format:
SPL_QUERY | gnmulti ip_field="(ip_field)"
Purpose: Retrieves noise status of the IP addresses represented by ip_field parameter present in each event, and adds the noise information to each event.
gncontext
Search format:
| gncontext ip="(ip_address)"
Purpose: Retrieves context information for a given IP address from the GreyNoise.
gnfilter
Search format:
SPL_QUERY | gnfilter ip_field="(ip_field)" noise_events="(true/false)"
Purpose: Filter Splunk events returned by given SPL_QUERY based on the noise status of IP address present in ip_field of the events. noise_events is an optional parameter with a default value of true. So, it will return events with noise IP addresses by default.
gnenrich
Search format:
SPL_QUERY | gnenrich ip_field="(ip_field)"
Purpose: Enrich the Splunk events returned by given SPL_QUERY with the context information of IP address represented by ip_field in Splunk Search.
gniptimeline
Search format:
| gniptimeline ip_address="<ip_address>" days=<days> limit=<limit>
Purpose: Retrieves Timeline information for a given IP address from the GreyNoise Timeline API.
Note: While executing the transforming commands from Splunk search UI, ensure that the event count passed to the command is less than 50,000, as per standard limits of Splunk. If the event count is higher than this number, the user can create a Saved Search and pass a higher number of Splunk statistical data to the command.

Alert Actions
The following alert actions are included as a part of the app:
- GreyNoise Quick Check: Returns noise information from GreyNoise for given IP addresses.
- GreyNoise Context Check: Returns context information from GreyNoise for given IP Addresses.
These alert actions can be used independently as well as with Splunk Enterprise Security in the form of Adaptive Response Actions. Results from these actions can be found in index=main sourcetype=greynoise
The two sources for these adaptive response actions are:
- source=greynoise_context
- source=greynoise_quick
Usage with Splunk Enterprise Security:
These actions can be executed from Incident Review, and results can be accessed directly by refreshing the "Adaptive Responses" panel and clicking the appropriate link.
Workflow Action
Identify Noise workflow action is enabled for all the CIM compliant IP fields which can be used to fetch the context information for the corresponding IP addresses.
Risk Scoring within Splunk ES
To update the risk score against the classification of GreyNoise scan result, follow the steps:
- From the Splunk UI, navigate to the ‘GreyNoise > Configuration.
- Navigate to the ‘Scan Deployment’ tab.
- Check the “Update Risk Score to Splunk ES” checkbox.
- Provide the desired risk score against each classification.
- Save the settings.
To analyse the risk score in the Splunk ES:
- From the Splunk UI, navigate to the Enterprise Security app.
- Navigate to the Analytics > Security intelligence > Risk analysis.
- Adjust the filters as per the requirements and check the panels.
Splunk ES - Threat Intelligence
GreyNoise App for Splunk provides integration with Enterprise Security Threat Intelligence. Follow the below mentioned steps below to add GreyNoise indicator data in Splunk ES:
- Navigate to the Splunk UI > Settings > Searches, reports, and alerts
- Select “GreyNoise App for Splunk (SA-GreyNoise)” under app dropdown and “All” under owner dropdown.
- Search for “greynoise_populate” in the filter. It will display four searches:
- greynoise_populate_ip_intel_benign
- greynoise_populate_ip_intel_malicious
- greynoise_populate_ip_intel_suspicious
- greynoise_populate_ip_intel_unknown
- For the required classification, click on Edit > Enable.
- Now, Navigate to Apps > Enterprise Security
- From the navigation bar, navigate to Configuration > Threat intelligence.
- Click on New > Local
- Fill out all the mandatory fields in the form.
- For the Type field, enter “threatlist”.
- For the URL field, select the appropriate URL name from the list below:
- lookup://greynoise_ip_intel_benign
- lookup://greynoise_ip_intel_malicious
- lookup://greynoise_ip_intel_suspicious
- lookup://greynoise_ip_intel_unknown
- The lookup data can be viewed under Analytics > Security intelligence > Threat intelligence > Indicators.
- The findings against the indicators can be reviewed under Analytics > Security intelligence > Threat intelligence > Findings (Threat Findings).
GreyNoise Feed as a Splunk Index
Introduced in v3.0.0, includes the capability to ingest GreyNoise feed data into the Splunk index and the KV lookup. The indexed data will contain all information for indicators.
To enable indexing the indicator data:
- Navigate to the Splunk UI > GreyNoise App for Splunk > Configuration > Feed Configuration.
- Check the “Ingest Feed To Index” box and select the desired “Index” from the dropdown.
- Once saved, the next collection of Feed data will be ingested in Splunk.
CIM (Common Information Model) mapping
The GreyNoise App for Splunk v3.0.0 comes with data mapping with Splunk CIM. The indicator data is mapped with the following CIM models:
- Network Traffic
- Vulnerabilities
Dashboard
This app contains the following three dashboards:
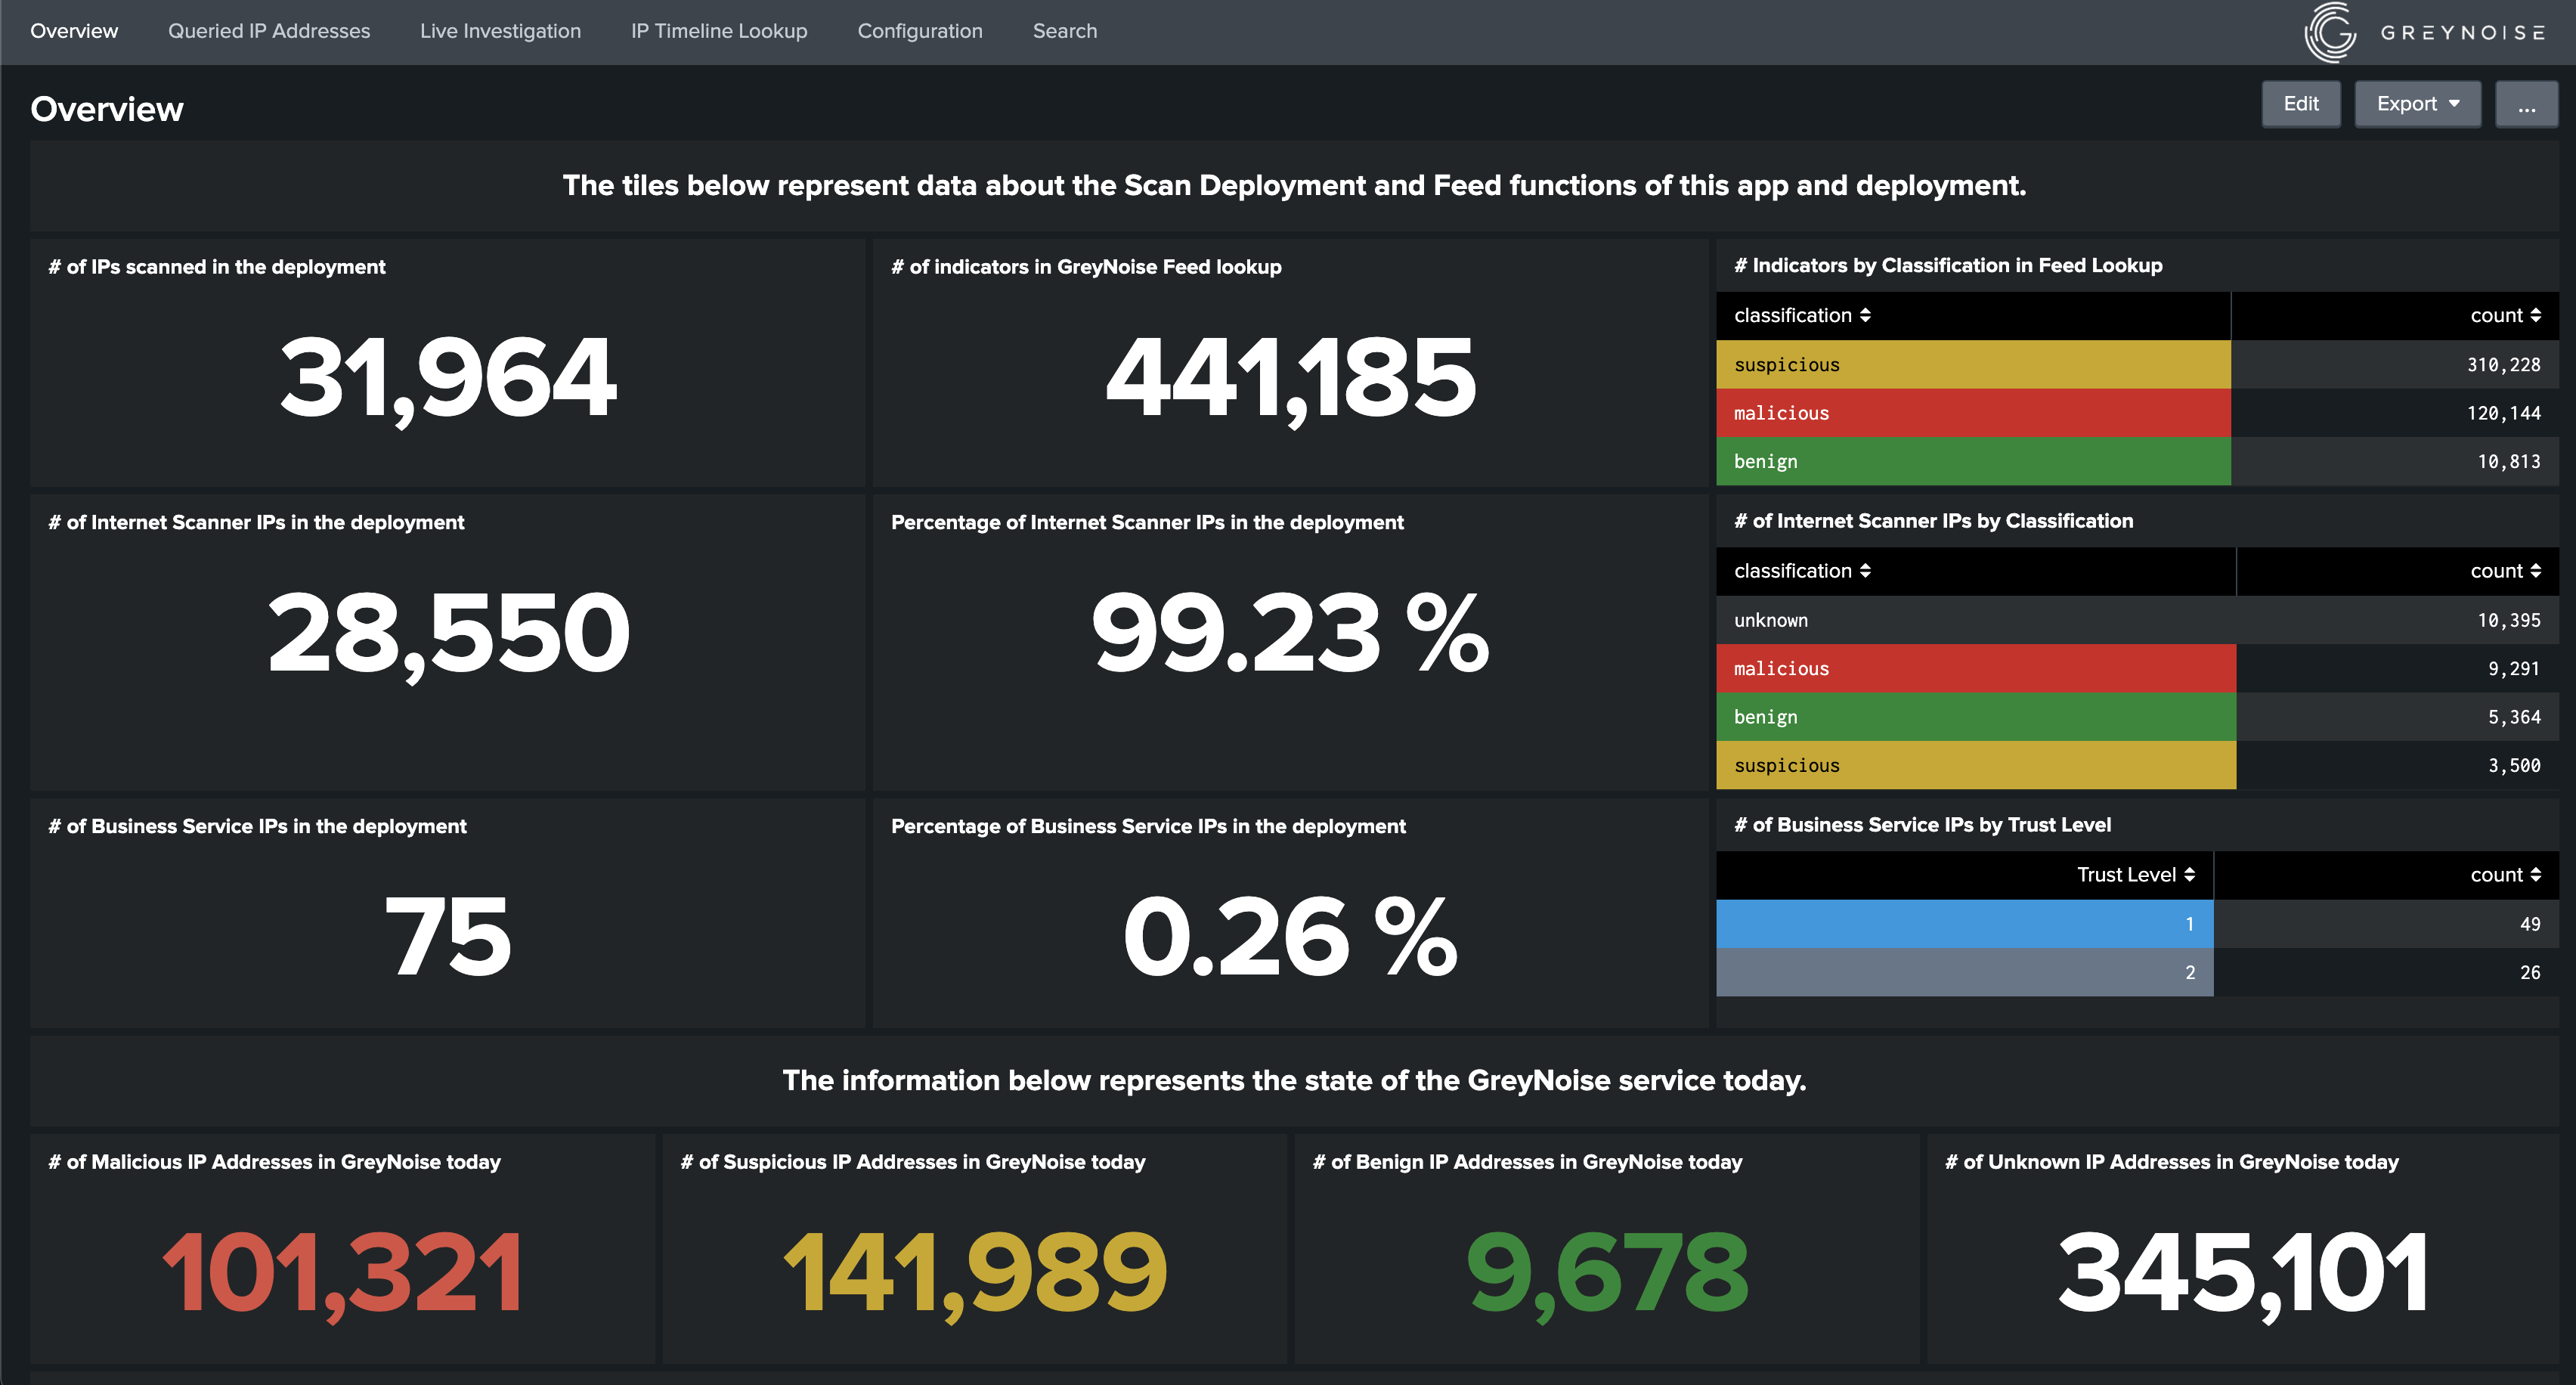
- Overview: This dashboard represents an overall visualization of the statistics provided by GreyNoise platform as well as the statistics of the Internet Scanner IPs and the Business Service Intelligence IPs in the Splunk deployment.
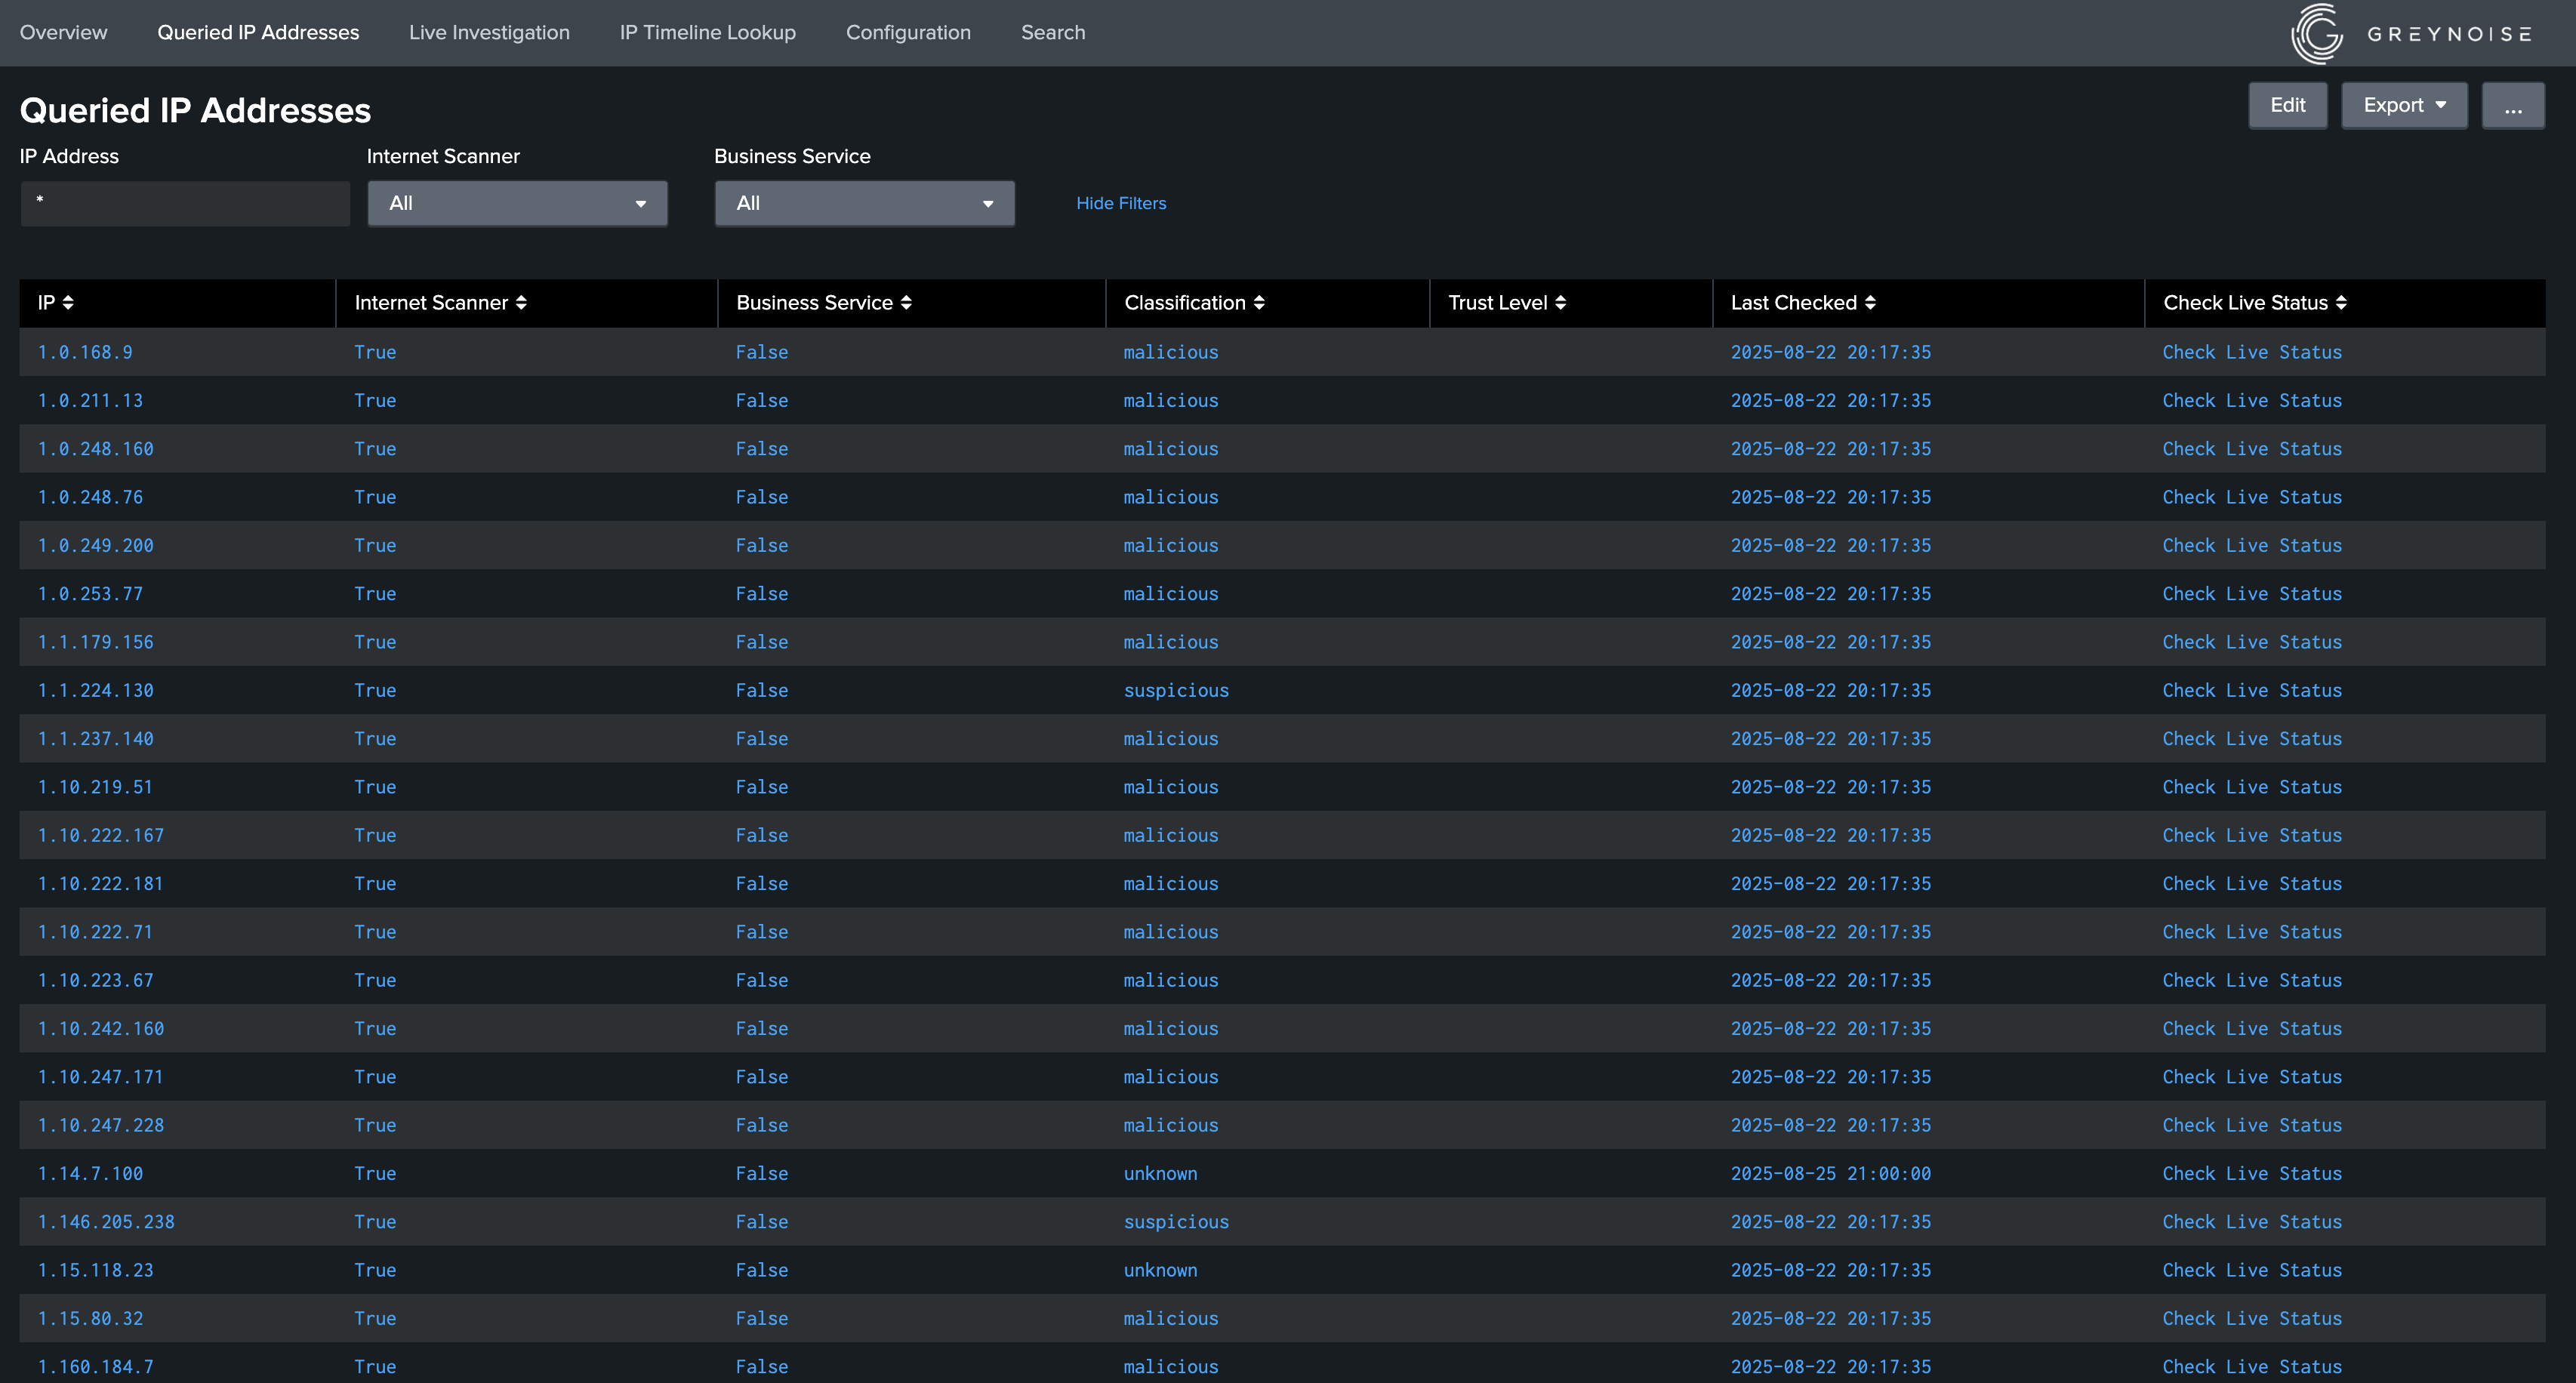
- Queried IP Addresses: This dashboard displays all the IP addresses along with their Internet Scanner and Business Service Intelligence status scanned by GreyNoise through Scan Deployment feature in the current Splunk deployment. This dashboard will be populated when Scan Deployment feature is enabled.
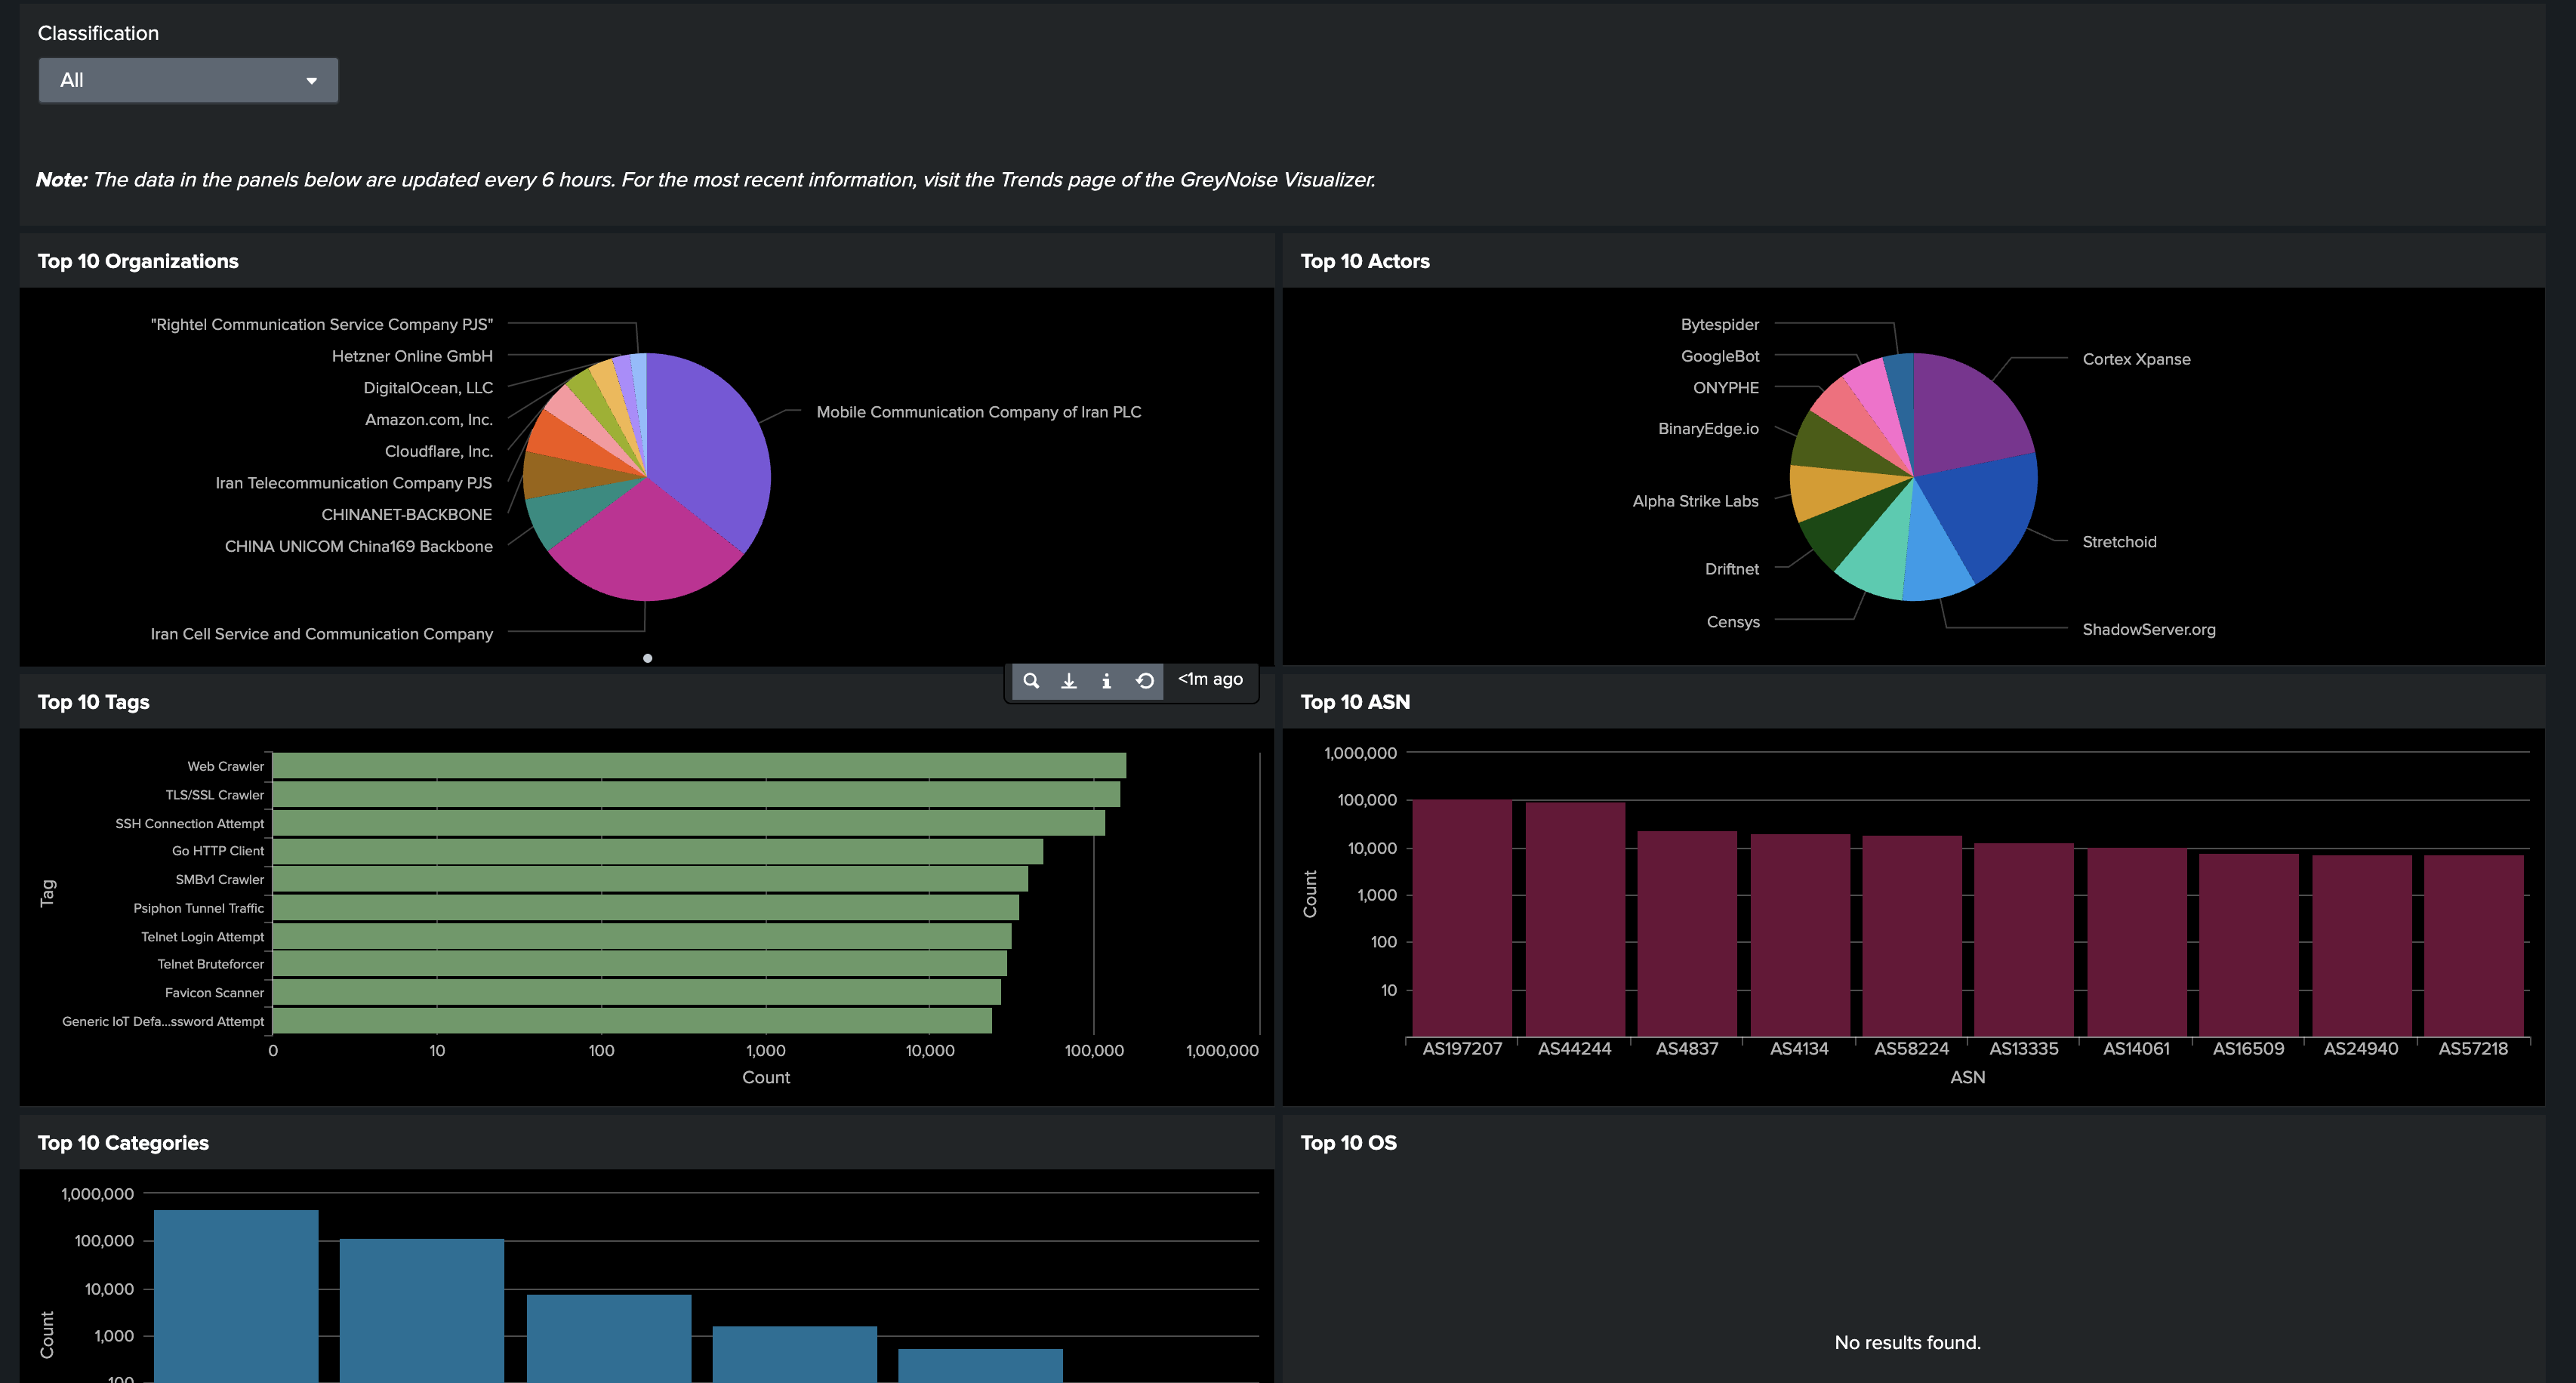
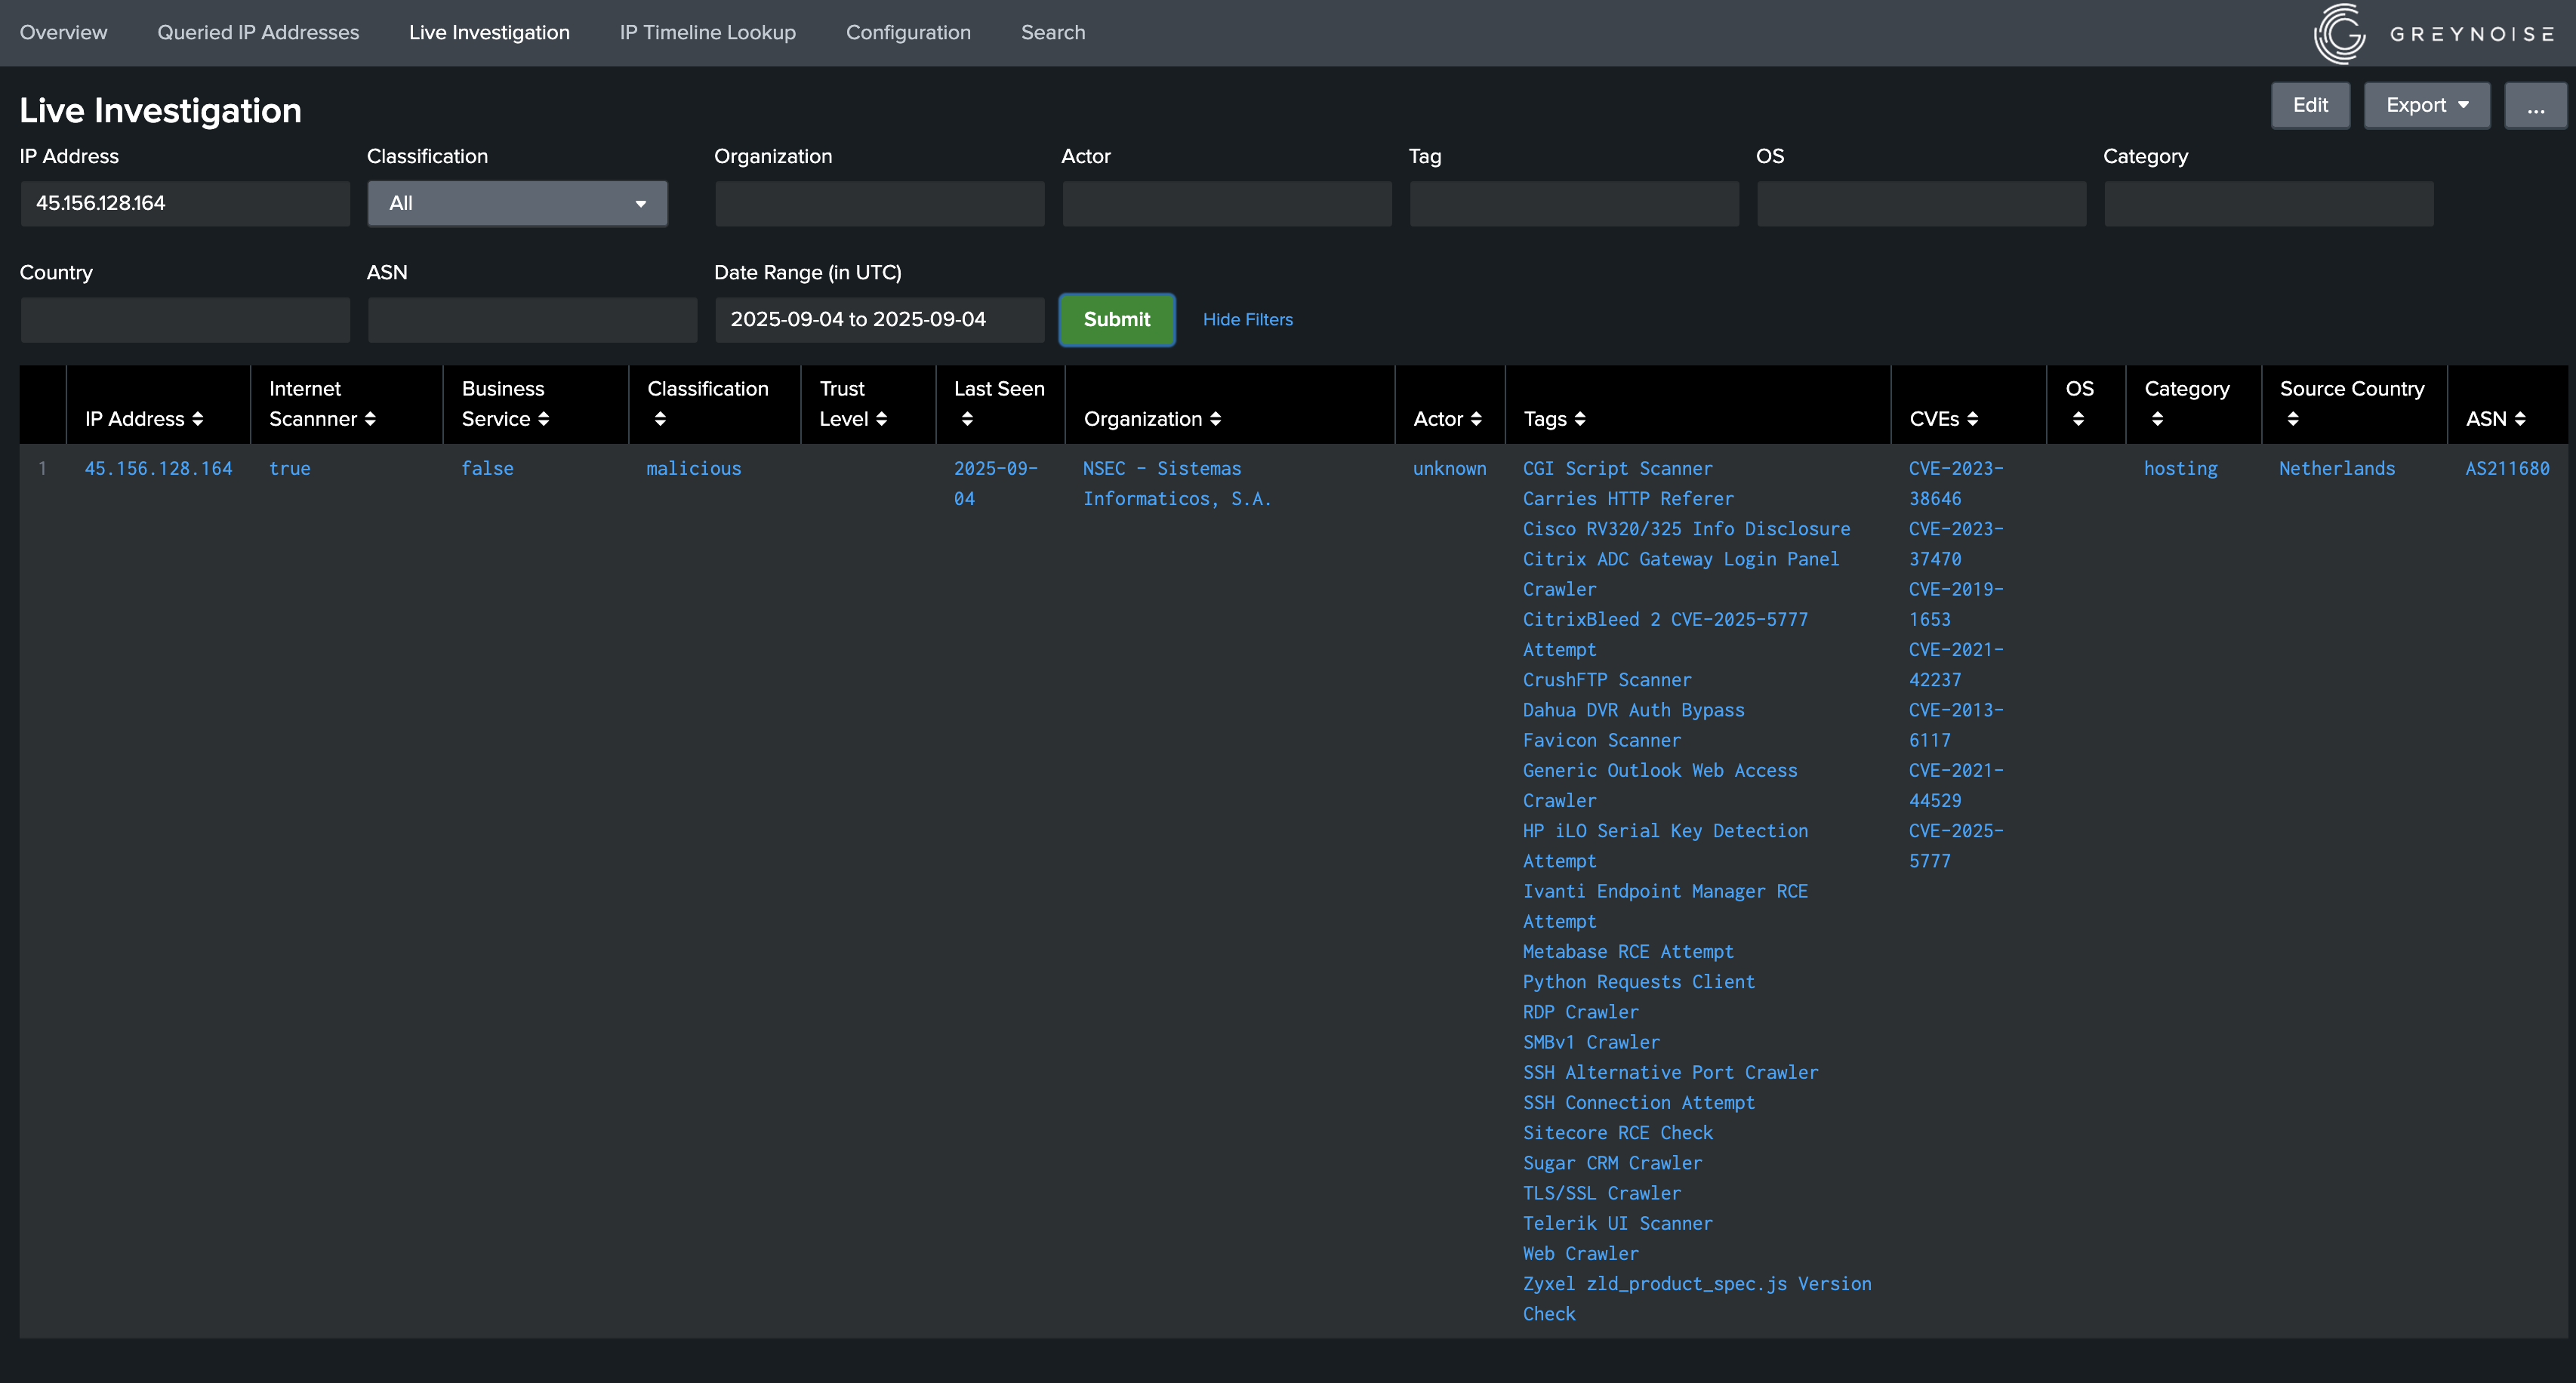
- Live Investigation: This dashboard can be used to obtain context information fetched dynamically from the GreyNoise platform based on the form input provided.
Saved Searches
This app contains the following saved searches, which are used for populating data in the dashboard:
- greynoise_scan_deployment_once: Used to populate gn_scan_deployment_ip_lookup lookup and is triggered after configuring Scan Deployment feature.
- greynoise_scan_deployment: Used to populate gn_scan_deployment_ip_lookup lookup and is triggered at an interval of 60 minutes and scans the data of previous 70 minutes.
- greynoise_overview_once: Used to populate gn_overview_lookup lookup, and is triggered after configuring the API key.
- greynoise_overview: Used to populate gn_overview_lookup lookup, and is triggered at an interval of 6 hours.
- greynoise_cache_maintenance: Used to remove those responses whose TTL is expired from the Cache for all the custom commands, and is triggered at an interval of 60 minutes.
- greynoise_feed_once: Used to populate the greynoise_indicators lookup with feed results and is triggered on-demand when enabling a Feed.
- greynoise_feed: Used to populate the greynoise_indicators lookup with feed results
- greynoise_feed_purge: Used to purge stale indicators (last_seen value over 7 days ago) from the greynoise_indicators lookup
- greynoise_migrate_greynoise_indicators_lookup: Migrates the contents of the greynoise_indicators.csv lookup to greynoise_indicators KV lookup (only run ONCE after upgrade to version 3.0.0. Not needed if installing version 3.0.0 or later.)
- greynoise_migrate_gn_overview_lookup: Migrates the contents of the gn_overview_lookup.csv lookup to gn_overview_lookup KV lookup (only run ONCE after upgrade to version 3.0.0. Not needed if installing version 3.0.0 or later.)
- greynoise_migrate_gn_scan_deployment_ip_lookup: Migrates the contents of the gn_scan_deployment_ip_lookup lookup from previous schema to new schema (only run ONCE after upgrade to version 3.0.0. Not needed if installing version 3.0.0 or later.)
- greynoise_populate_ip_intel_malicious: This savedsearch retrieves ip from greynoise_indicators lookup and populate data in greynoise_ip_intel_malicious lookup
- greynoise_populate_ip_intel_suspicious: This savedsearch retrieves ip from greynoise_indicators lookup and populate data in greynoise_ip_intel_suspicious lookup
- greynoise_populate_ip_intel_unknown: This savedsearch retrieves ip from greynoise_indicators lookup and populate data in greynoise_ip_intel_unknown lookup
- greynoise_populate_ip_intel_benign: This savedsearch retrieves ip from greynoise_indicators lookup and populate data in greynoise_ip_intel_benign lookup
Note : greynoise_scan_deployment_once and greynoise_scan_deployment savedsearches are used for scanning the data indexed in Splunk. So, in case when these saved searches are skipped, the data indexed during that interval will not be scanned for Internet Scanner and Business Service Intelligence status.
Troubleshooting
Issue: Scan Deployment Indexes List Missing Indexes
In the case where the Scan Deployment Indexes drop-down does not contain all of the expected indexes, and when the Splunk system contains multiple search heads, it is required that an indexes.conf file is added to the local directory of the GreyNoise Splunk App with a list of all the desired indexes. This will then force the drop-down to contain the desired indexes.
Updated about 2 months ago