
Microsoft Sentinel Use Case Guide 3
Flag Authentication Attempts from Compromised Hosts
Flag Authentication Attempts from Compromised Hosts
Overview
Every organization's identity provider and VPN gateway receives thousands of authentication attempts daily - the vast majority of which are automated credential stuffing, brute-force, and password spray attacks. Standard detection logic treats all of these uniformly: a failed login generates a low-priority alert, and a successful login is trusted and passed through.
This approach has a critical blind spot.
Some of these attempts originate from IPs that GreyNoise has confirmed are actively conducting mass scanning operations, running botnet infrastructure, or operating known command-and-control (C2) servers. When one of those IPs successfully authenticates to your Azure Active Directory or VPN environment, it is not a routine login event - it is an immediate indicator of compromise, regardless of whether the credentials were technically valid.
The GreyNoise Solution
By integrating GreyNoise threat indicators into your authentication log pipeline within Microsoft Sentinel, this use case cross-references every authentication event - both successful and failed - against GreyNoise's global threat dataset, surfacing two distinct high-value signals. A successful authentication from a GreyNoise-flagged IP is treated as a P1 - act immediately, confirming that a known threat actor has gained active access using valid credentials. A failed authentication from the same IP classification is treated as P2 - investigate and monitor, indicating that your organization is being specifically targeted rather than caught in indiscriminate mass scanning.
Prerequisites
Ensure your environment meets these prerequisites before beginning the setup:
Tools and Access
| Prerequisites | Details |
|---|---|
| Microsoft Sentinel | An active Microsoft Sentinel workspace in Azure. |
| GreyNoise Solution | GreyNoise Enterprise is installed from the Sentinel Content Hub. |
| GreyNoise Threat Intelligence | GreyNoise Threat Intelligence connector installed from the Sentinel Content Hub. |
| API Key | GreyNoise API key configured during connector deployment. |
| Classification Setting | Connector deployed with Classification parameter set to: malicious, unknown, benign, suspicious. |
| Firewall Logs | CommonSecurityLog (CEF-based logs from Palo Alto, Check Point, Fortinet, etc.) |
| Log Fields | Logs must contain: SourceIP, Activity, DeviceAction fields |
Table
The entire GreyNoise data is stored in this one Table:
| Table | Purpose |
|---|---|
| ThreatIntelIndicators | Stores GreyNoise IP indicators ingested daily. |
Implementation Steps
Step 1: Verify Raw Authentication Events and Field Extraction
Confirm your logs are in Sentinel and the required fields are populated.
CommonSecurityLog
| take 5
| project TimeGenerated, SourceIP, DestinationIP, DestinationPort, CommunicationDirection, DeviceAction
Expected result: You should see SourceIP, DestinationIP, etc., populated in the results before proceeding.
Step 2: Enrich with GreyNoise Using ThreatIntelIndicators Join
This is where the GreyNoise integration does its work. The ThreatIntelIndicators join matches every source IP in the authentication logs against GreyNoise's actively validated threat indicators. All GreyNoise fields are extracted from the Data column JSON blob using parse_json(Data).
let GreyNoiseThreatIPs = ThreatIntelIndicators
   | extend d          = parse_json(Data)
   | where tostring(d.name) has "GreyNoise"
   | extend ThreatType = tostring(d.indicator_types[0])
   | where ThreatType !in ("benign") and d.confidence == 100
   | where isnotempty(ObservableValue)
   | project ObservableValue, ThreatType;
CommonSecurityLog
// Update Activity Value as per Source Vendor Mapping
   | where Activity has_any ("authentication", "login", "vpn", "logon", "auth")
   | where isnotempty(SourceIP)
   | extend UserPrincipalName = SourceUserName
   | extend IPAddress         = SourceIP
   | extend Outcome           = iff(DeviceAction in~ ("allow", "success", "accept", "allowed", "accepted"), "SUCCESS", "FAILURE")
   | join kind=inner GreyNoiseThreatIPs on $left.IPAddress == $right.ObservableValue
Step 3: Apply Filters and Assign Severity
Apply progressive filters to retain only real, confirmed threat IPs, then assign a severity level based on the authentication outcome and GreyNoise classification. This creates a clear triage order so analysts know exactly what to work on first.
You can choose the desired query from the options below that matches your Sentinel setup:
// Create a variable storing GreyNoise threat IPs with high confidence that are not benign
let GreyNoiseThreatIPs = ThreatIntelIndicators
   | extend d = parse_json(Data)
// Filter to only include records where the 'name' field contains "GreyNoise"
   | where tostring(d.name) has "GreyNoise"
   | extend ThreatType = tostring(d.indicator_types[0])
  // Keep only malicious/suspicious threats with 100% confidence level
   | where ThreatType !in ("benign") and d.confidence == 100
   | where isnotempty(ObservableValue)
   | project ObservableValue, ThreatType;
// Query authentication-related security logs
CommonSecurityLog
// Filter only authentication-related activities (login, VPN, logon, etc.)
   | where Activity has_any ("authentication", "login", "vpn", "logon", "auth")
   | where isnotempty(SourceIP)
   | extend IPAddress = SourceIP
// Classify outcome as SUCCESS or FAILURE based on DeviceAction
   | extend Outcome = iff(DeviceAction in~ ("allow", "success", "accept", "allowed", "accepted"), "SUCCESS", "FAILURE")
// Join with threat IPs to find authentication attempts from known threats
   | join kind=inner GreyNoiseThreatIPs on $left.IPAddress == $right.ObservableValue
// Assign severity level based on outcome and threat type combination
   | extend Severity = case(
     Outcome == "SUCCESS" and ThreatType == "malicious", "P1-HIGH",
     Outcome == "SUCCESS" and ThreatType == "suspicious",   "P2-MEDIUM",
     Outcome == "SUCCESS" and ThreatType == "unknown",   "P2-MEDIUM",
     Outcome == "FAILURE" and ThreatType == "malicious", "P2-MEDIUM",
     Outcome == "FAILURE" and ThreatType == "suspicious",   "P2-LOW",
     "P3-INFO")
// Count authentication attempts per IP, grouped by severity and threat type
   | summarize Attempts = count()
    by IPAddress, Severity, ThreatType
// Create numeric ordering for severity levels to enable proper sorting
   | extend SeverityOrder = case(
    Severity == "P1-HIGH",   1,
    Severity == "P2-MEDIUM", 2,
    Severity == "P2-LOW", 3,
    99)
// Sort by severity (critical first) then by attempt count (highest first)
   | sort by SeverityOrder asc, Attempts desc
// Remove the temporary ordering column from final results
   | project-away SeverityOrder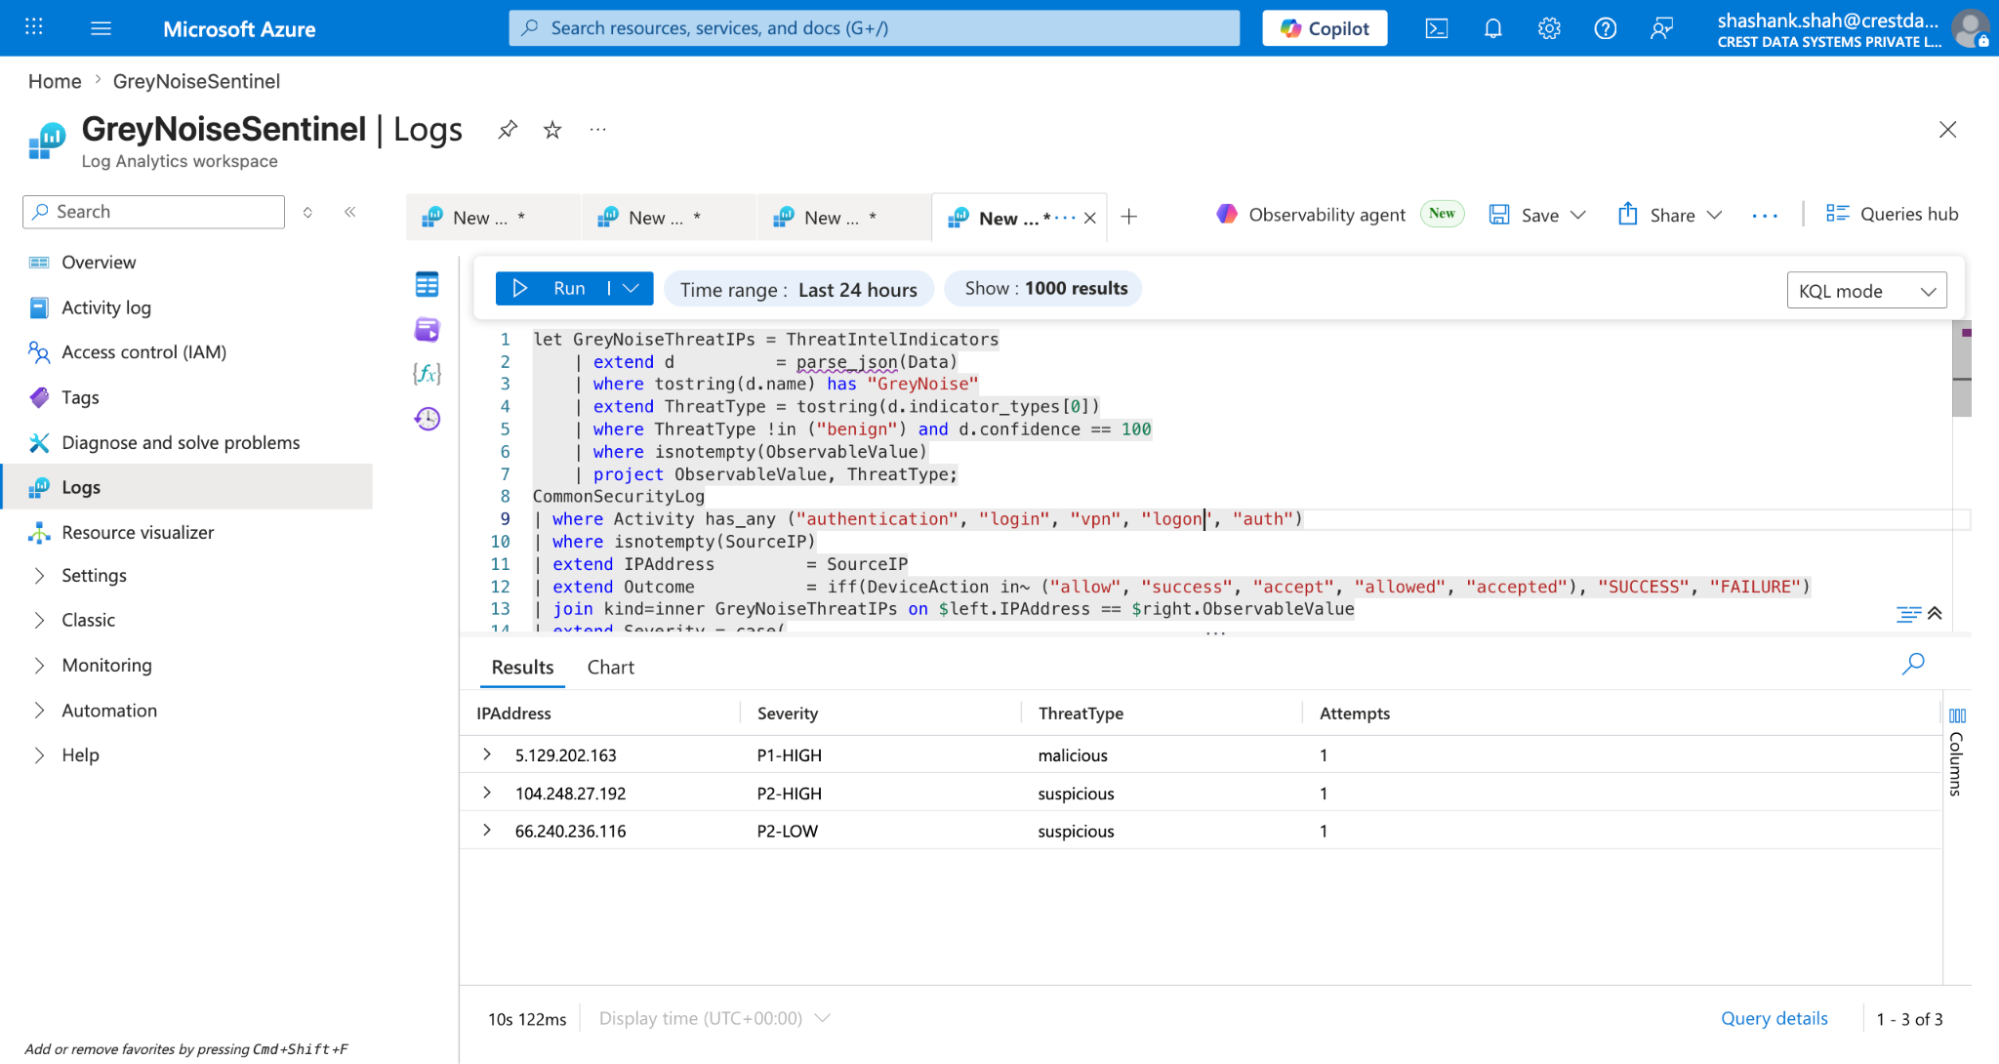
Not all flagged auth events carry the same risk. The severity assignment creates a clear triage order, so analysts know exactly what to work on first.
Severity reference:
| Severity | Condition |
|---|---|
| P1-HIGH | outcome=SUCCESS AND classification=malicious → Active account compromise from known threat infrastructure |
| P2-MEDIUM | outcome=SUCCESS AND classification=suspicious or unknown → Successful auth from IP, needs immediate review |
| P2-MEDIUM | outcome=FAILURE AND classification=malicious → Active targeting of your org, not yet successful |
| P2-LOW | outcome=FAILURE AND classification=suspicious → Targeting of your org, not yet successful |
| P3-INFO | All other IPs that are not classified by GreyNoise. |
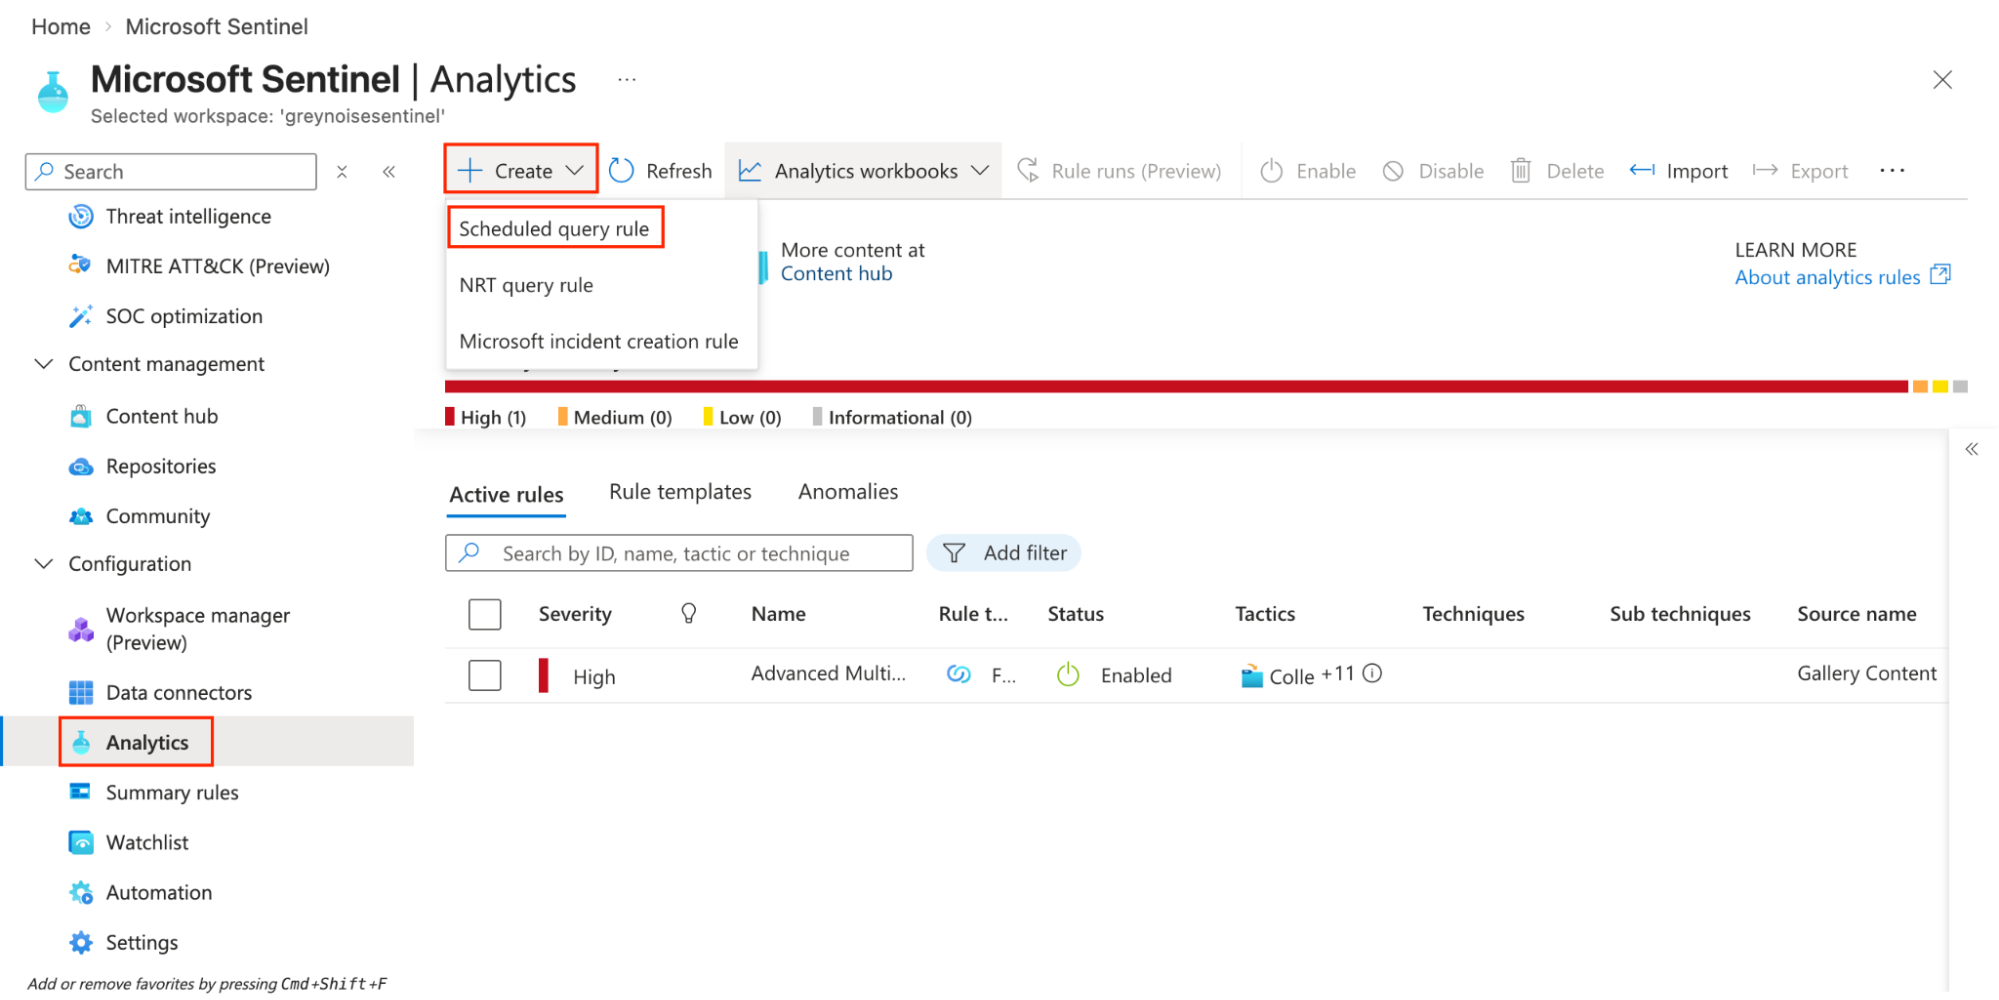
Step 4: Automate as a Sentinel Analytics Rule
Once the query is verified end-to-end, save it as a recurring Sentinel Analytics Rule for continuous automated monitoring:
- Navigate to Microsoft Sentinel Workspace → Analytics → Create → Scheduled query rule.
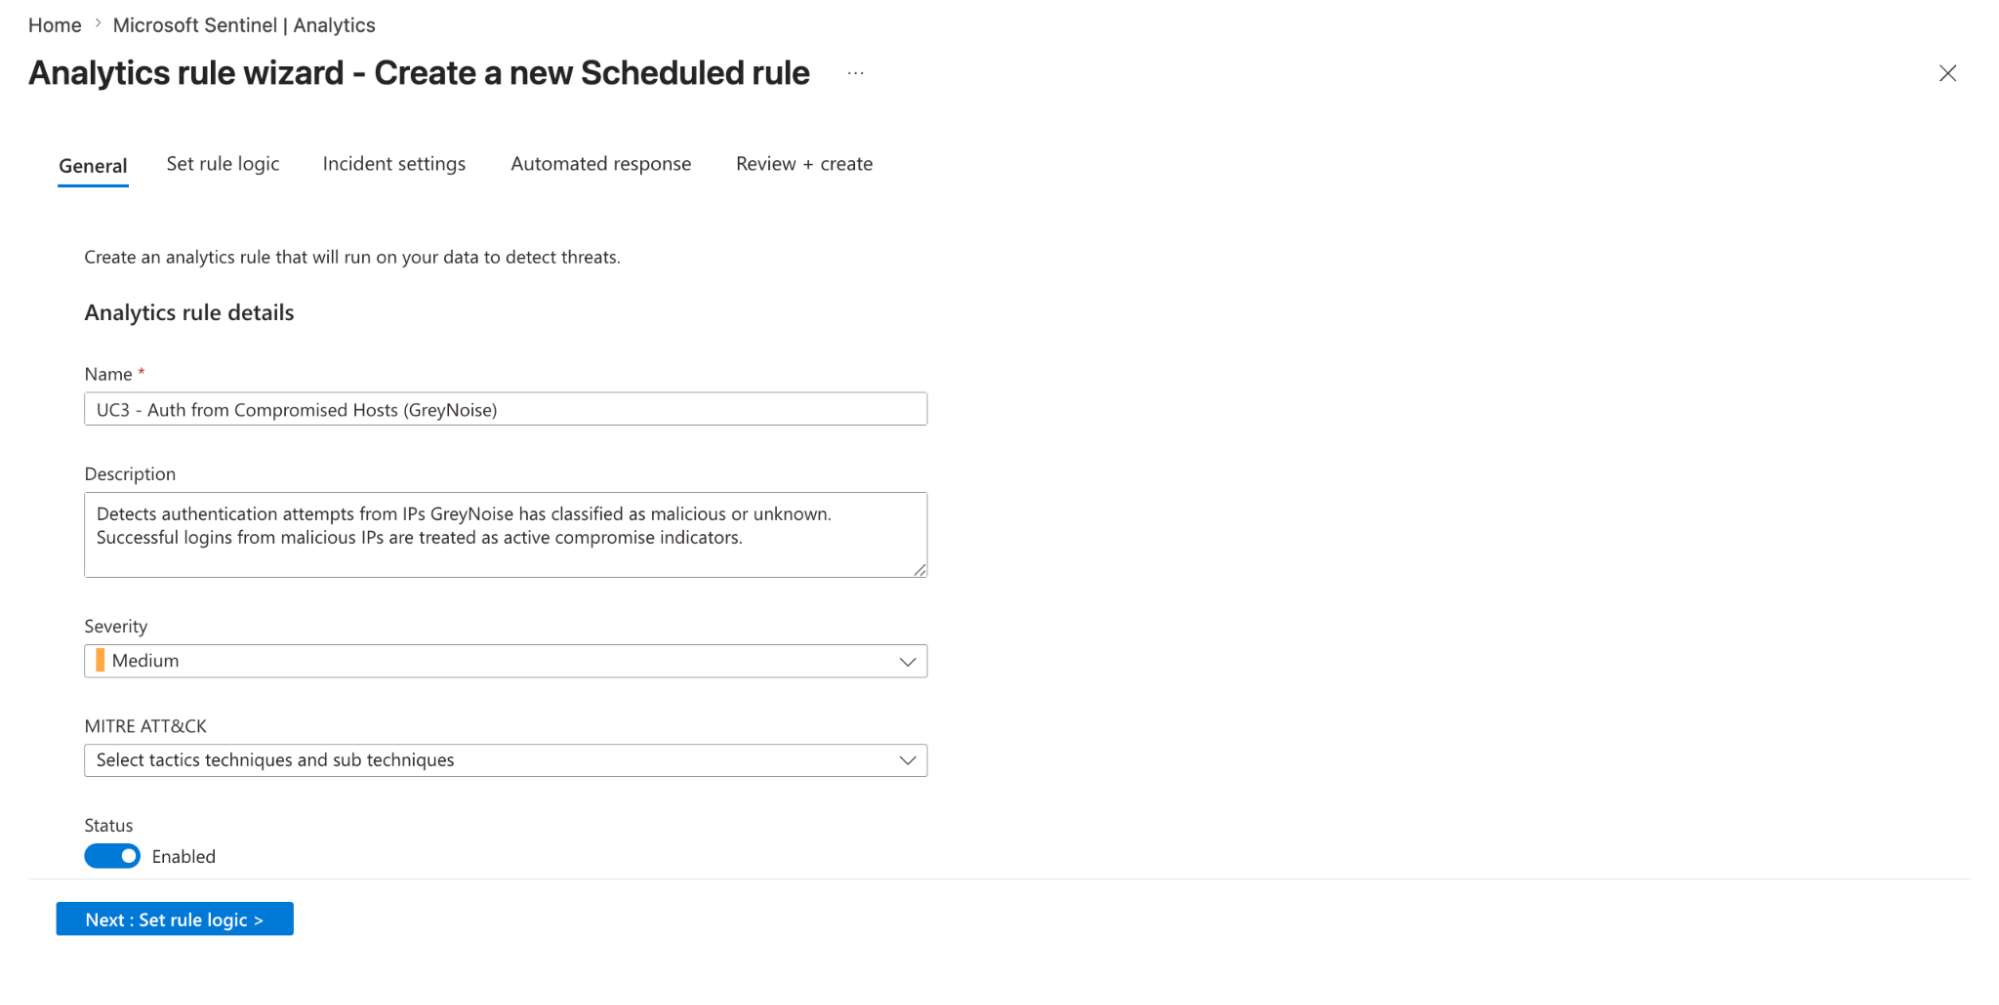
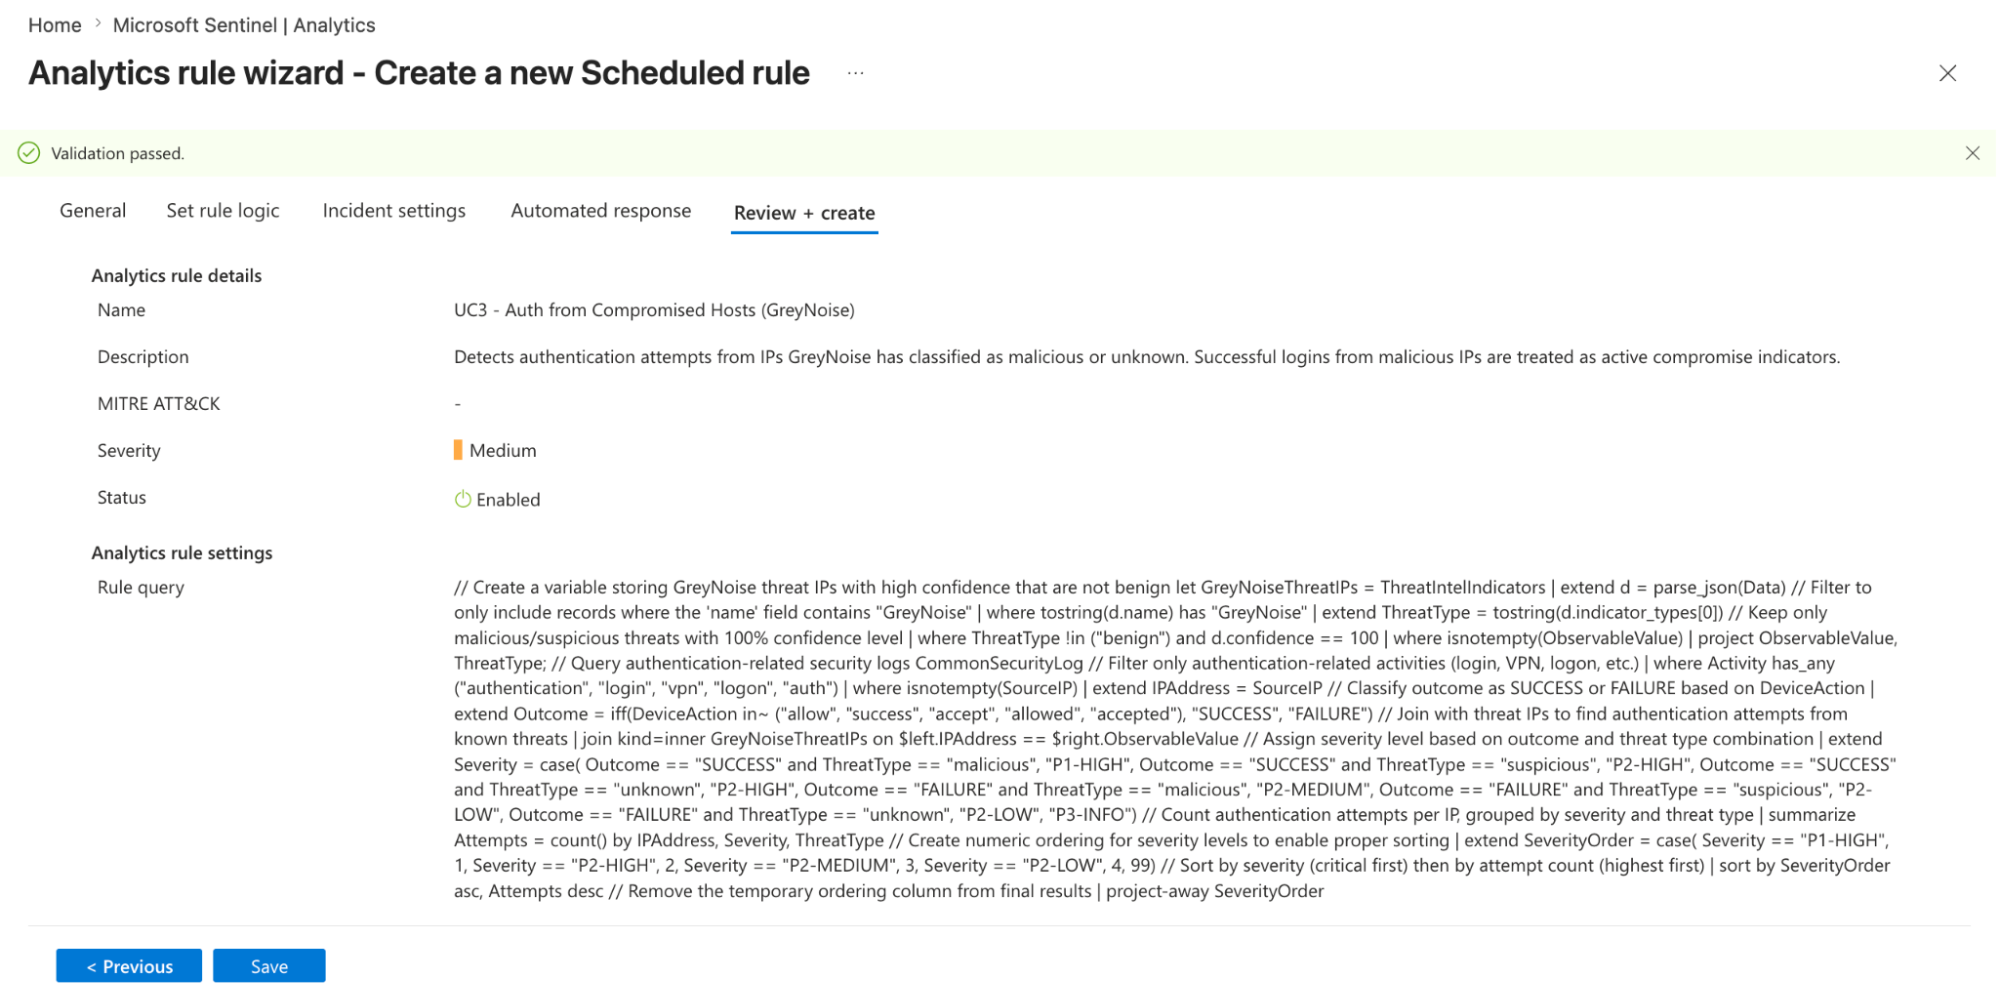
-
Title: UC3 - Auth from Compromised Hosts (GreyNoise)
-
Description: Detects authentication attempts from IPs GreyNoise has classified as malicious or unknown. Successful logins from malicious IPs are treated as active compromise indicators.
-
Severity: Select desired severity
-
MITRE ATT&CK: Select tactics, techniques, and sub-techniques.
-
Tactics: Credential Access
-
Technique: T1110 - Brute Force
-
Sub-Technique: T1110.001 - Password Guessing
-
Click on Next: Set rule logic option
-
Rule query: Provide the query created in step 3.
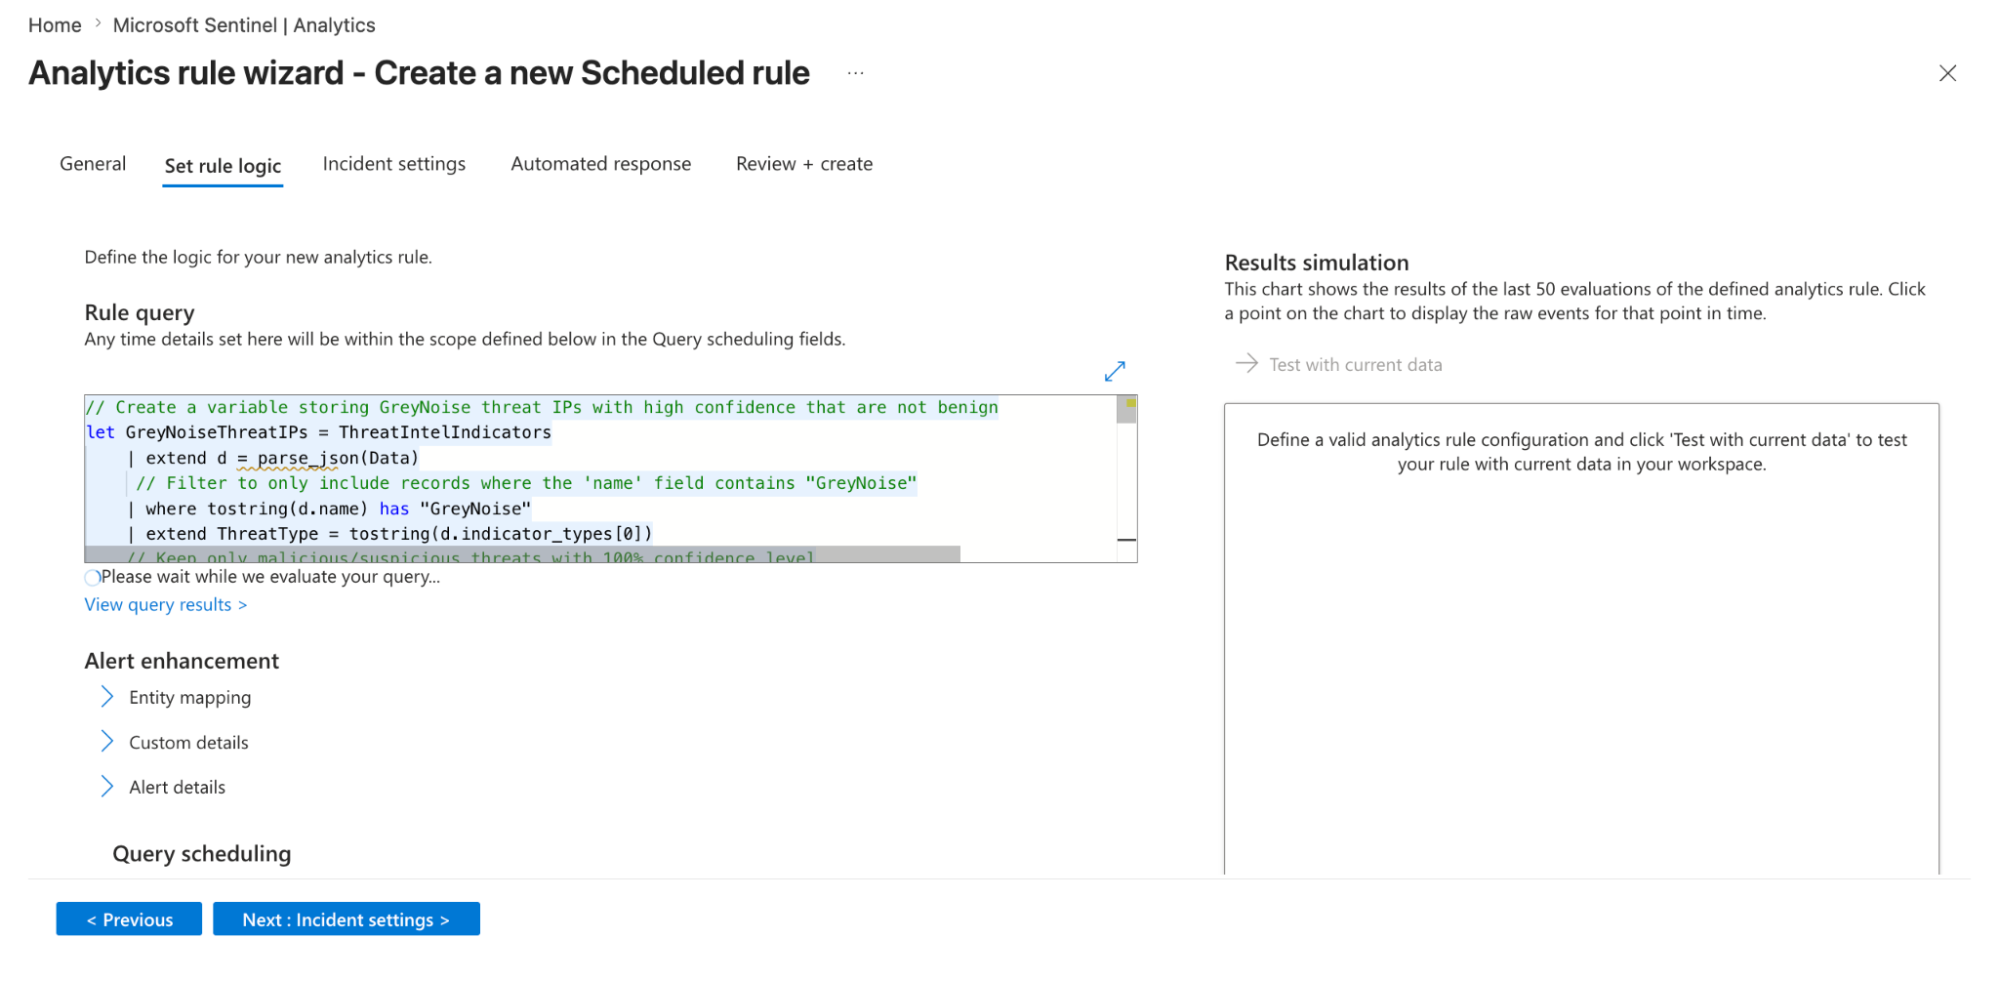
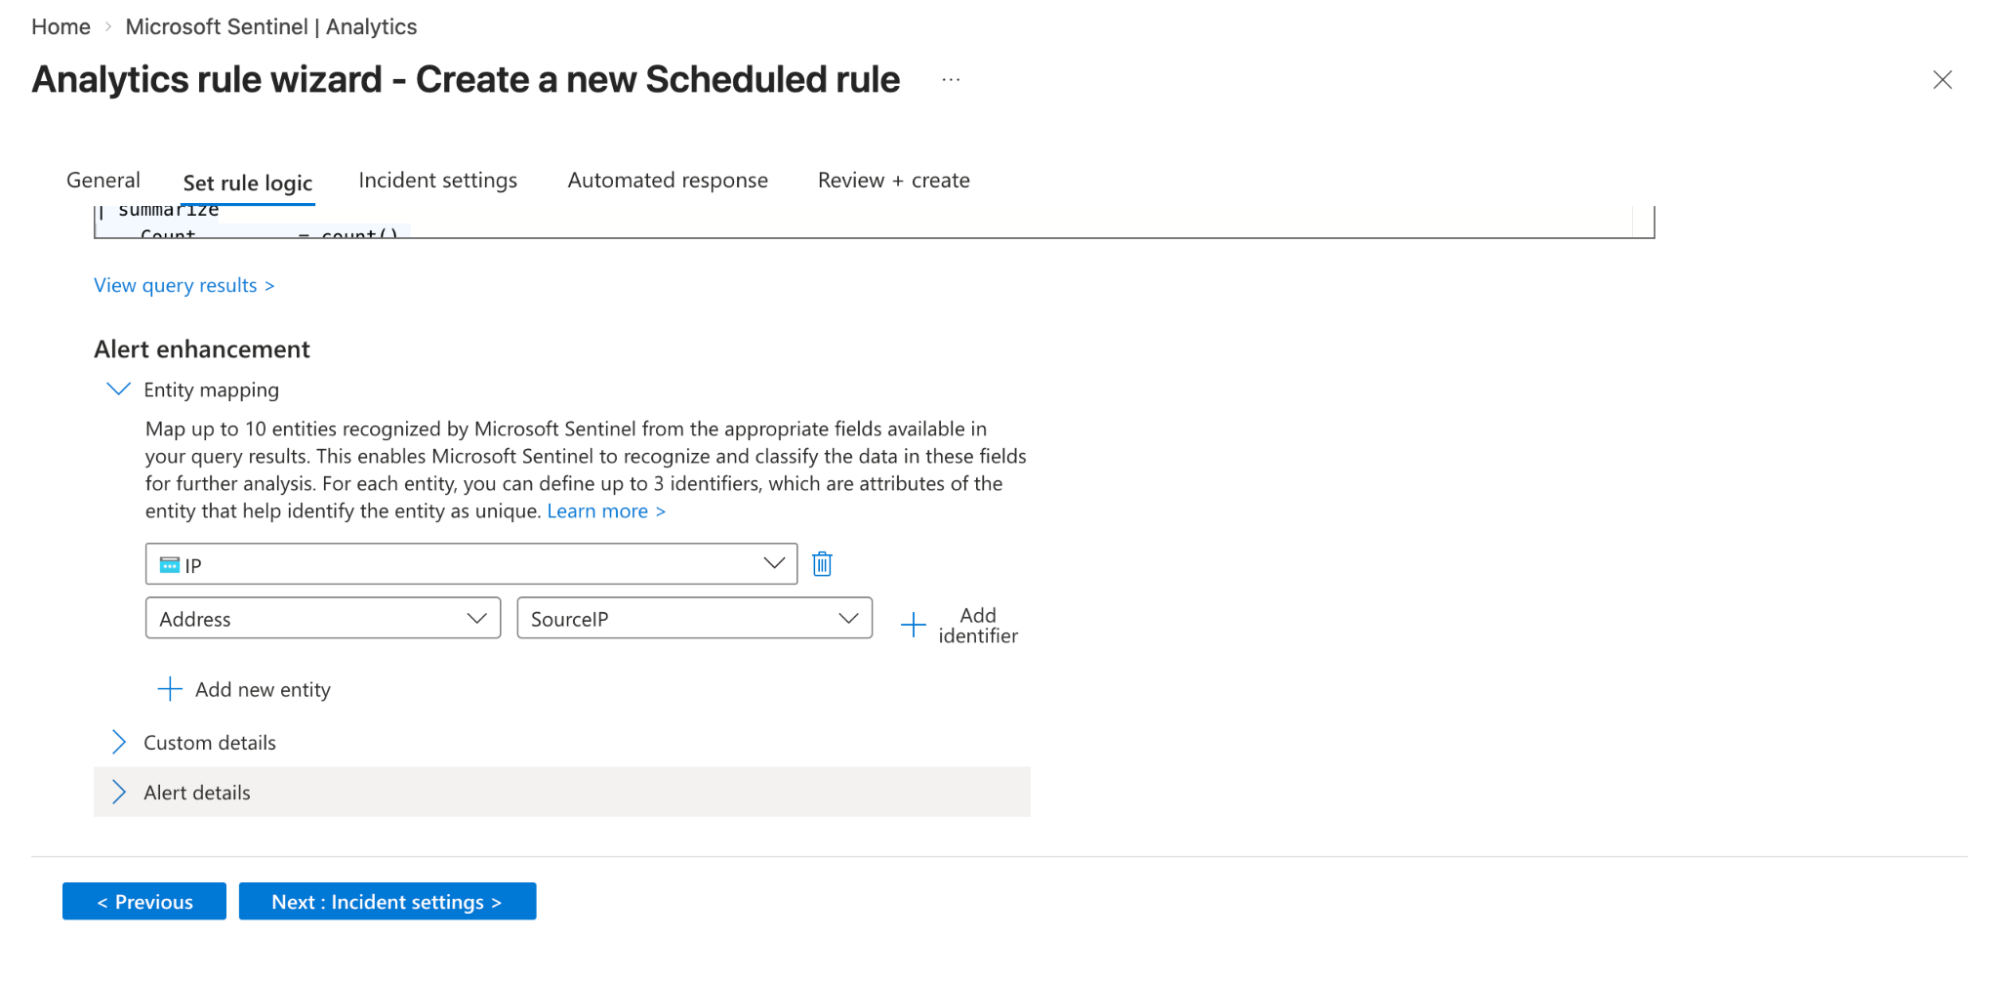
- Entity Mapping:
- Map relevant fields from your query results to Sentinel entities (for example, map
SourceIPto the IP entity type). This allows Sentinel to enrich alerts with context and helps in investigation and correlation within incidents.
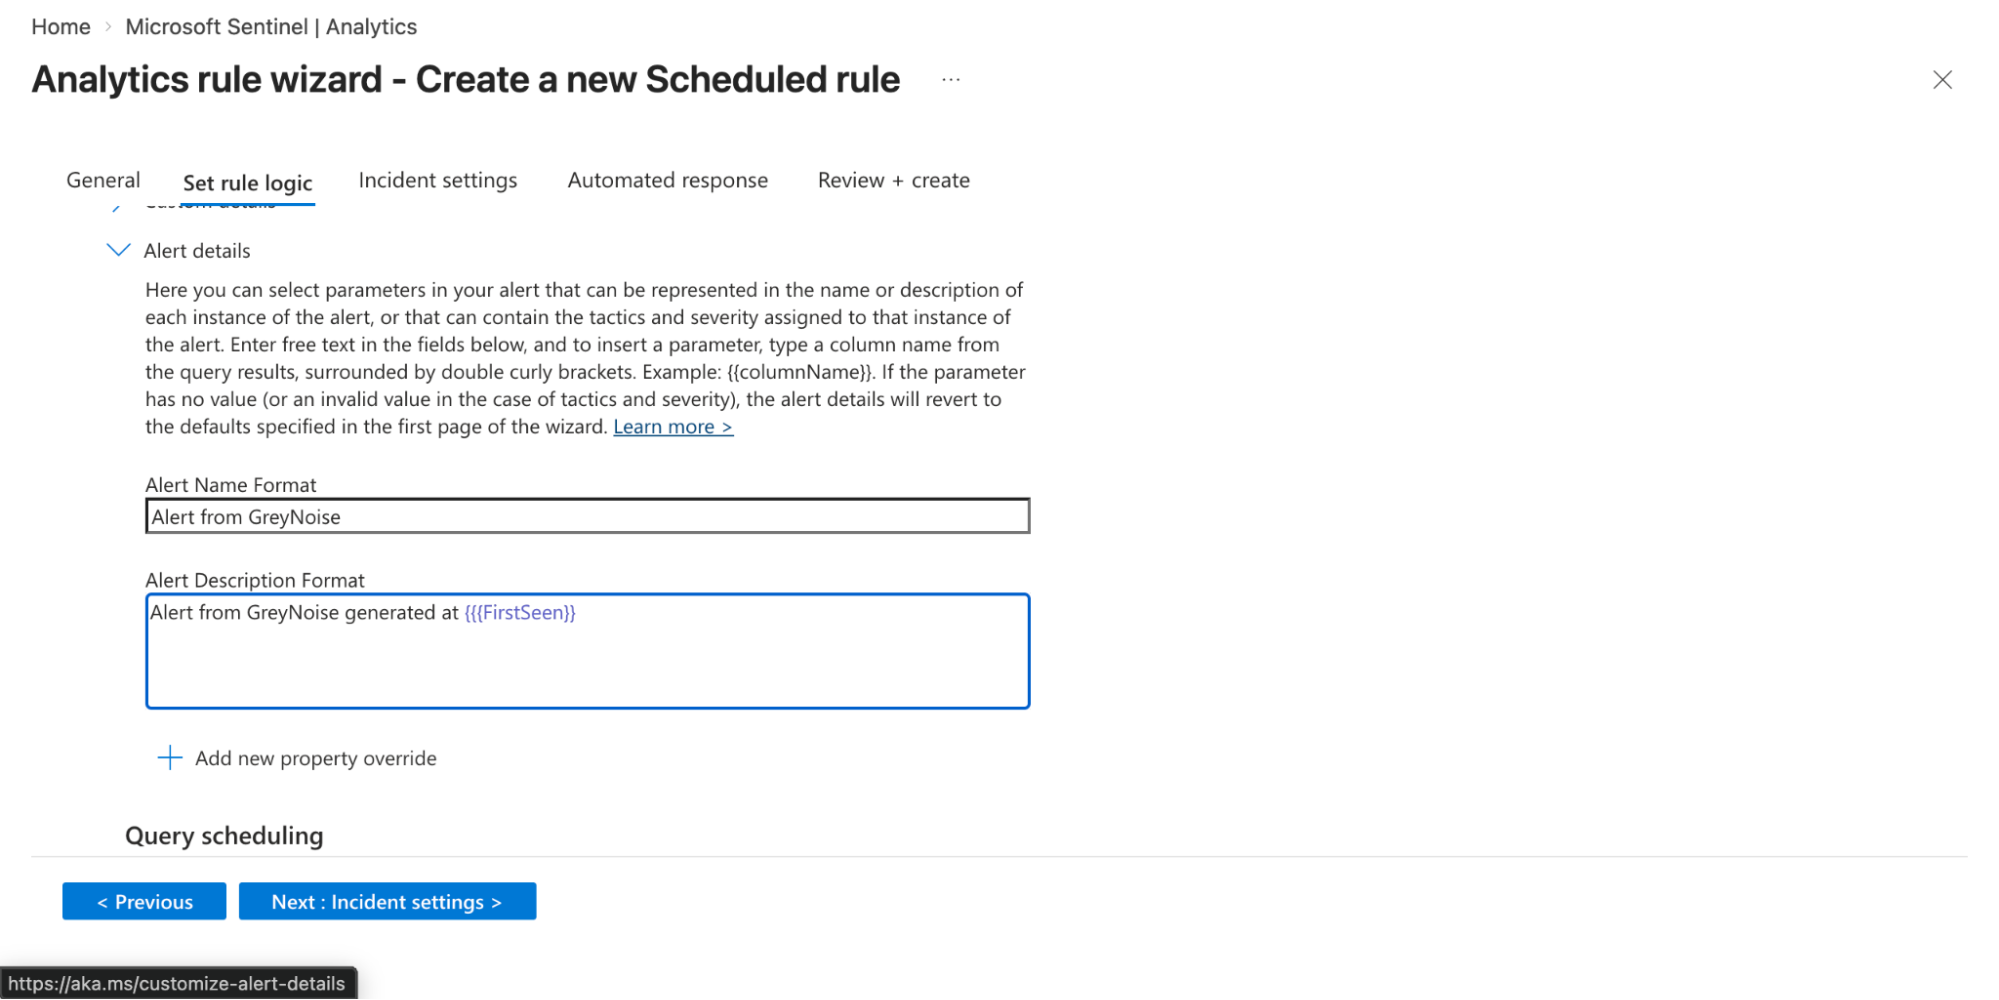
- Alert details:
- Provide a meaningful alert name in the Alert Name Format text box.
- Enter the description in the Alert Description Format text box. You can also dynamically customize these using query fields (e.g., include IP addresses or usernames) so each alert provides better context during investigation.
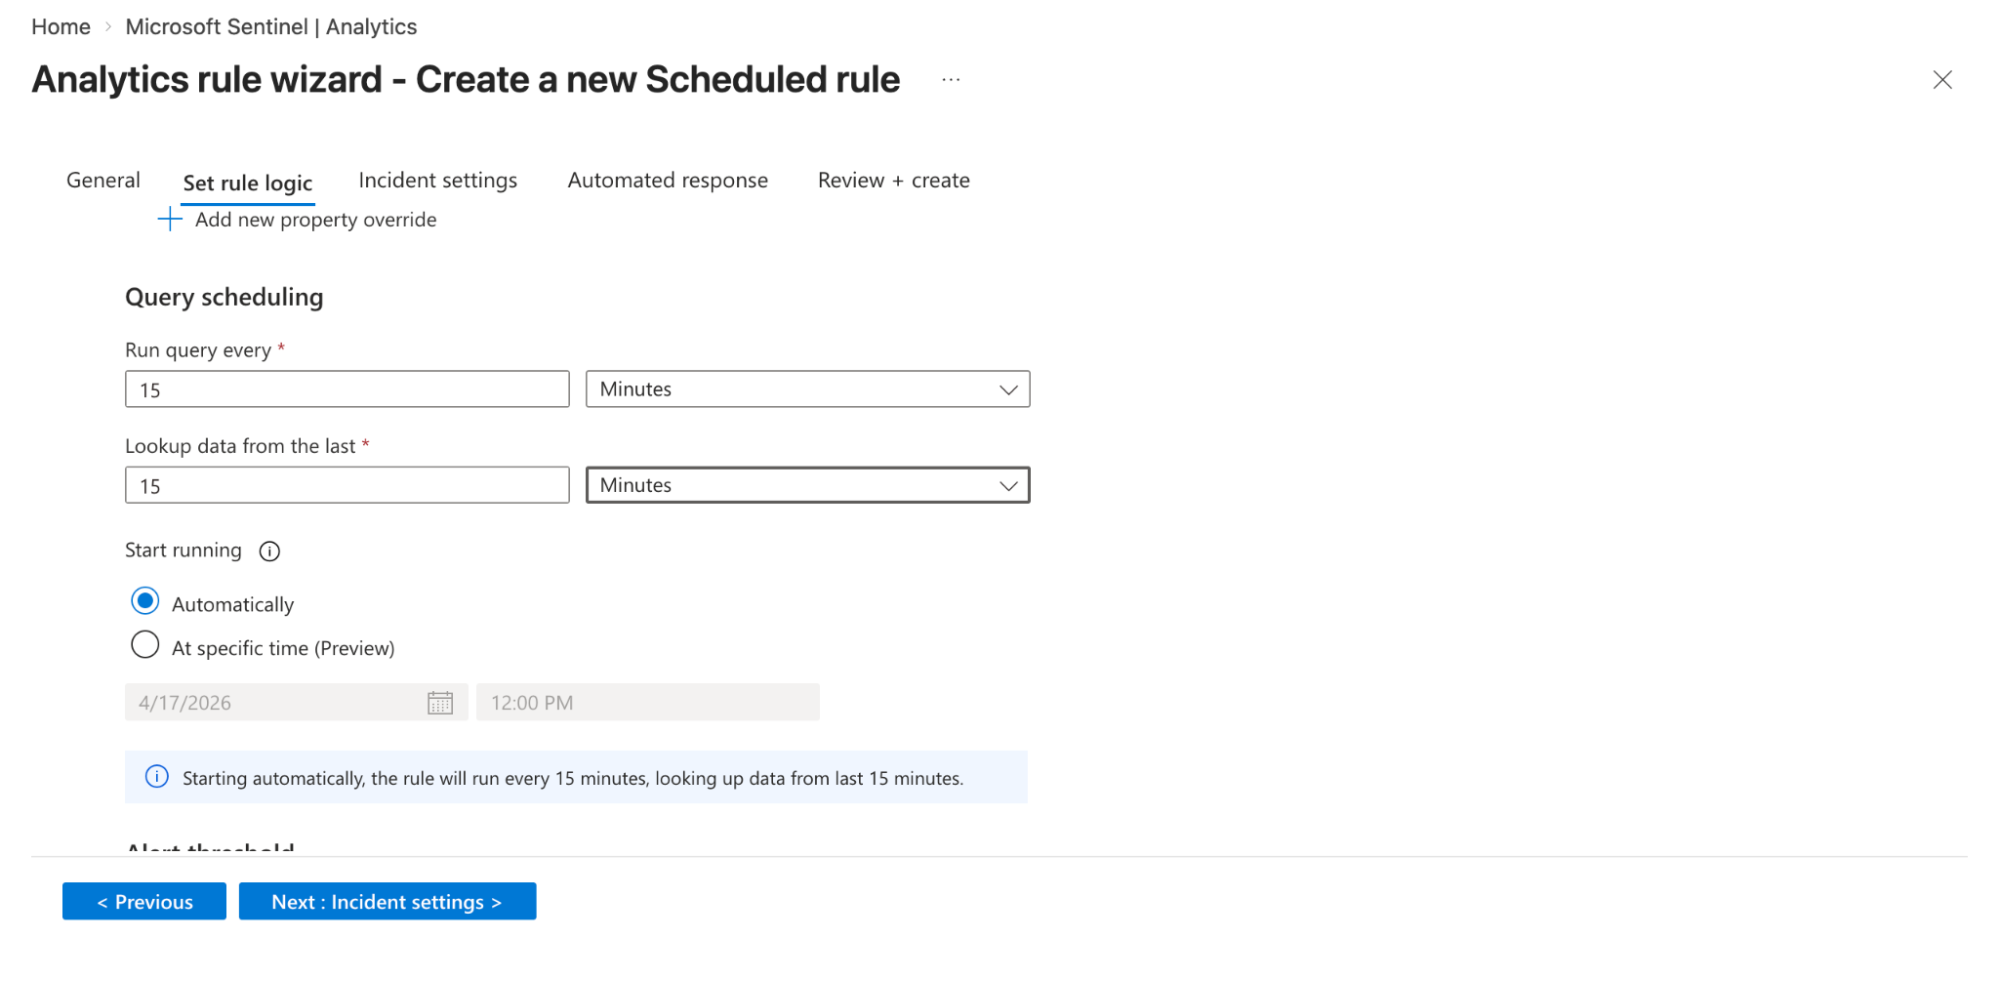
- Query scheduling
- Set how frequently the rule runs in the Run query every text box.
- Enter the amount of historical data it analyzes in the Lookup data text box. The lookback period should be at least as long as the run interval to avoid missing events.
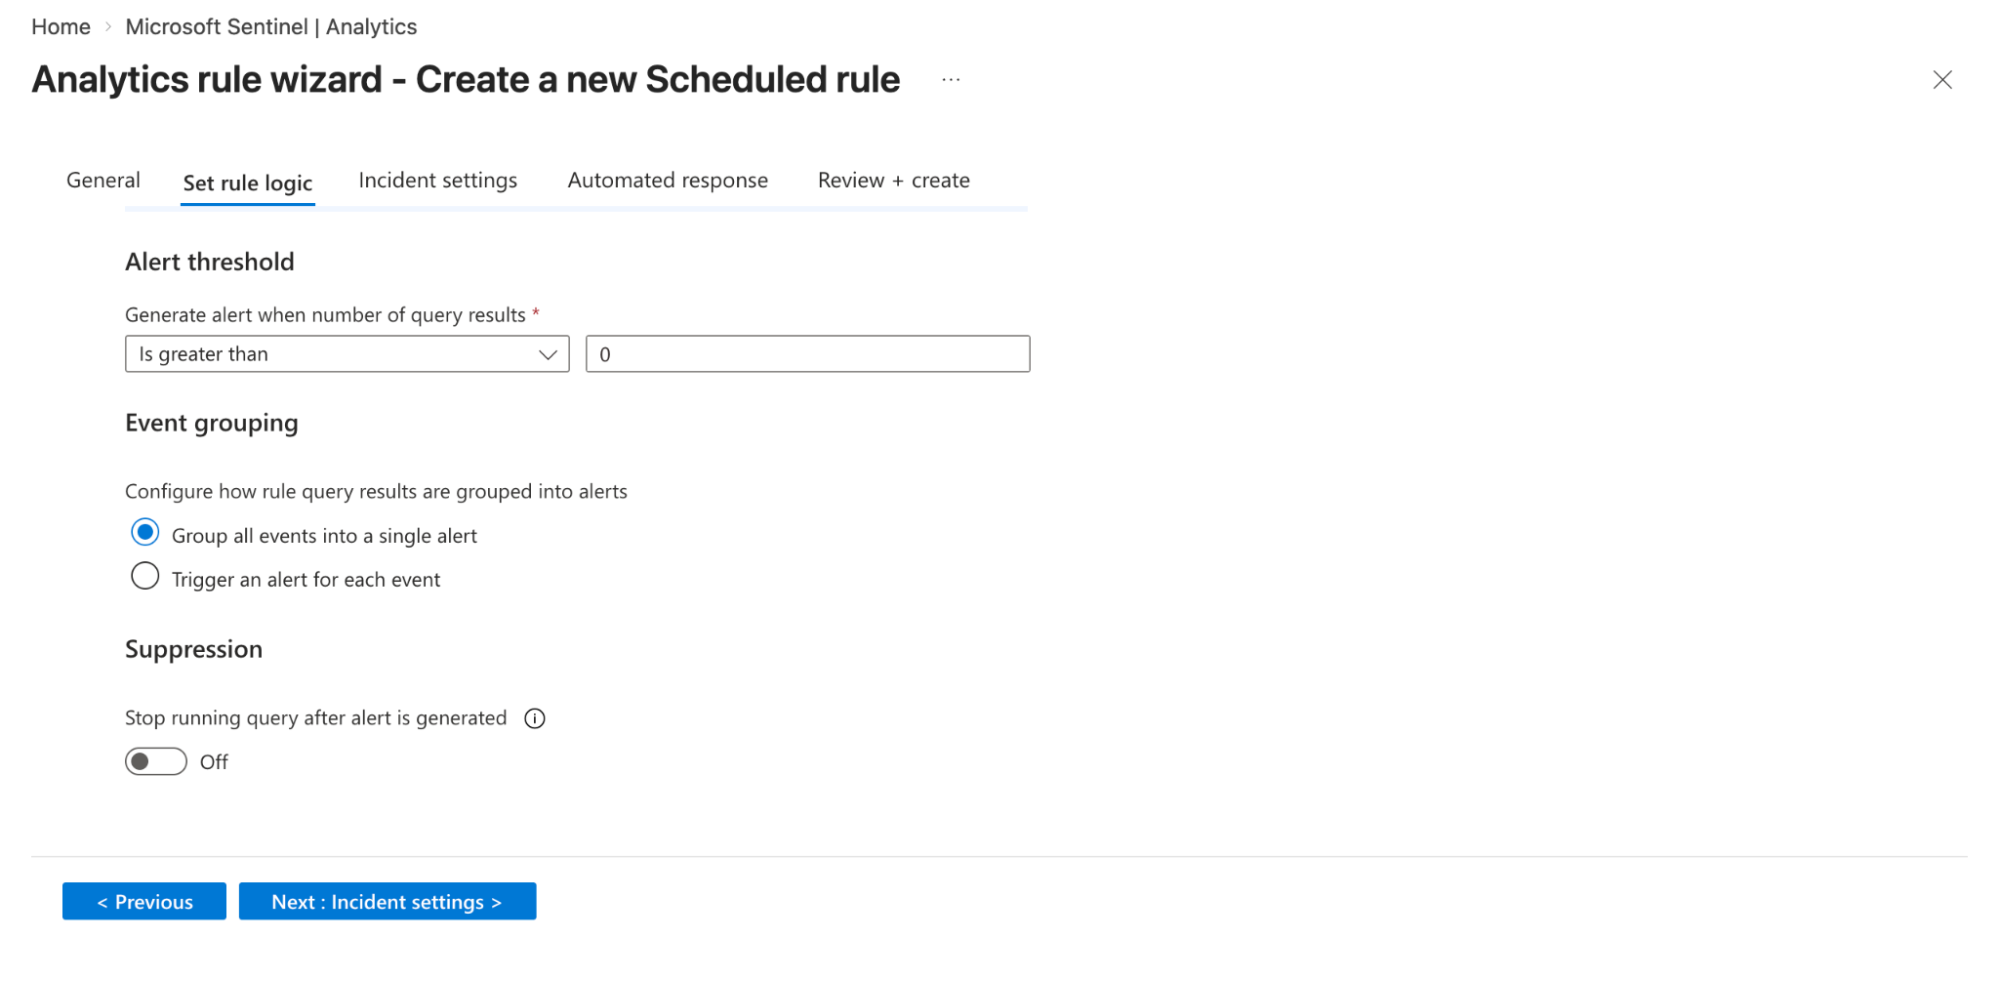
- Alert threshold
- Define when an alert should be generated based on query results in the Generate alerts when number of query results option. (e.g., trigger an alert when results are greater than a defined number). This helps control noise and adjust detection sensitivity.
- Decide how alerts are generated from query results:
- Group all events into a single alert: Creates one alert summarizing all matching events.
- Trigger an alert for each event: Generates a separate alert for each event for granular visibility.
- You can enable suppression to stop the rule from running after an alert is triggered.
-
Click on the Next: Incident settings option.
-
Incident Settings
- Configure the rule to automatically create incidents from generated alerts. This ensures alerts are grouped into incidents for SOC investigation workflows.
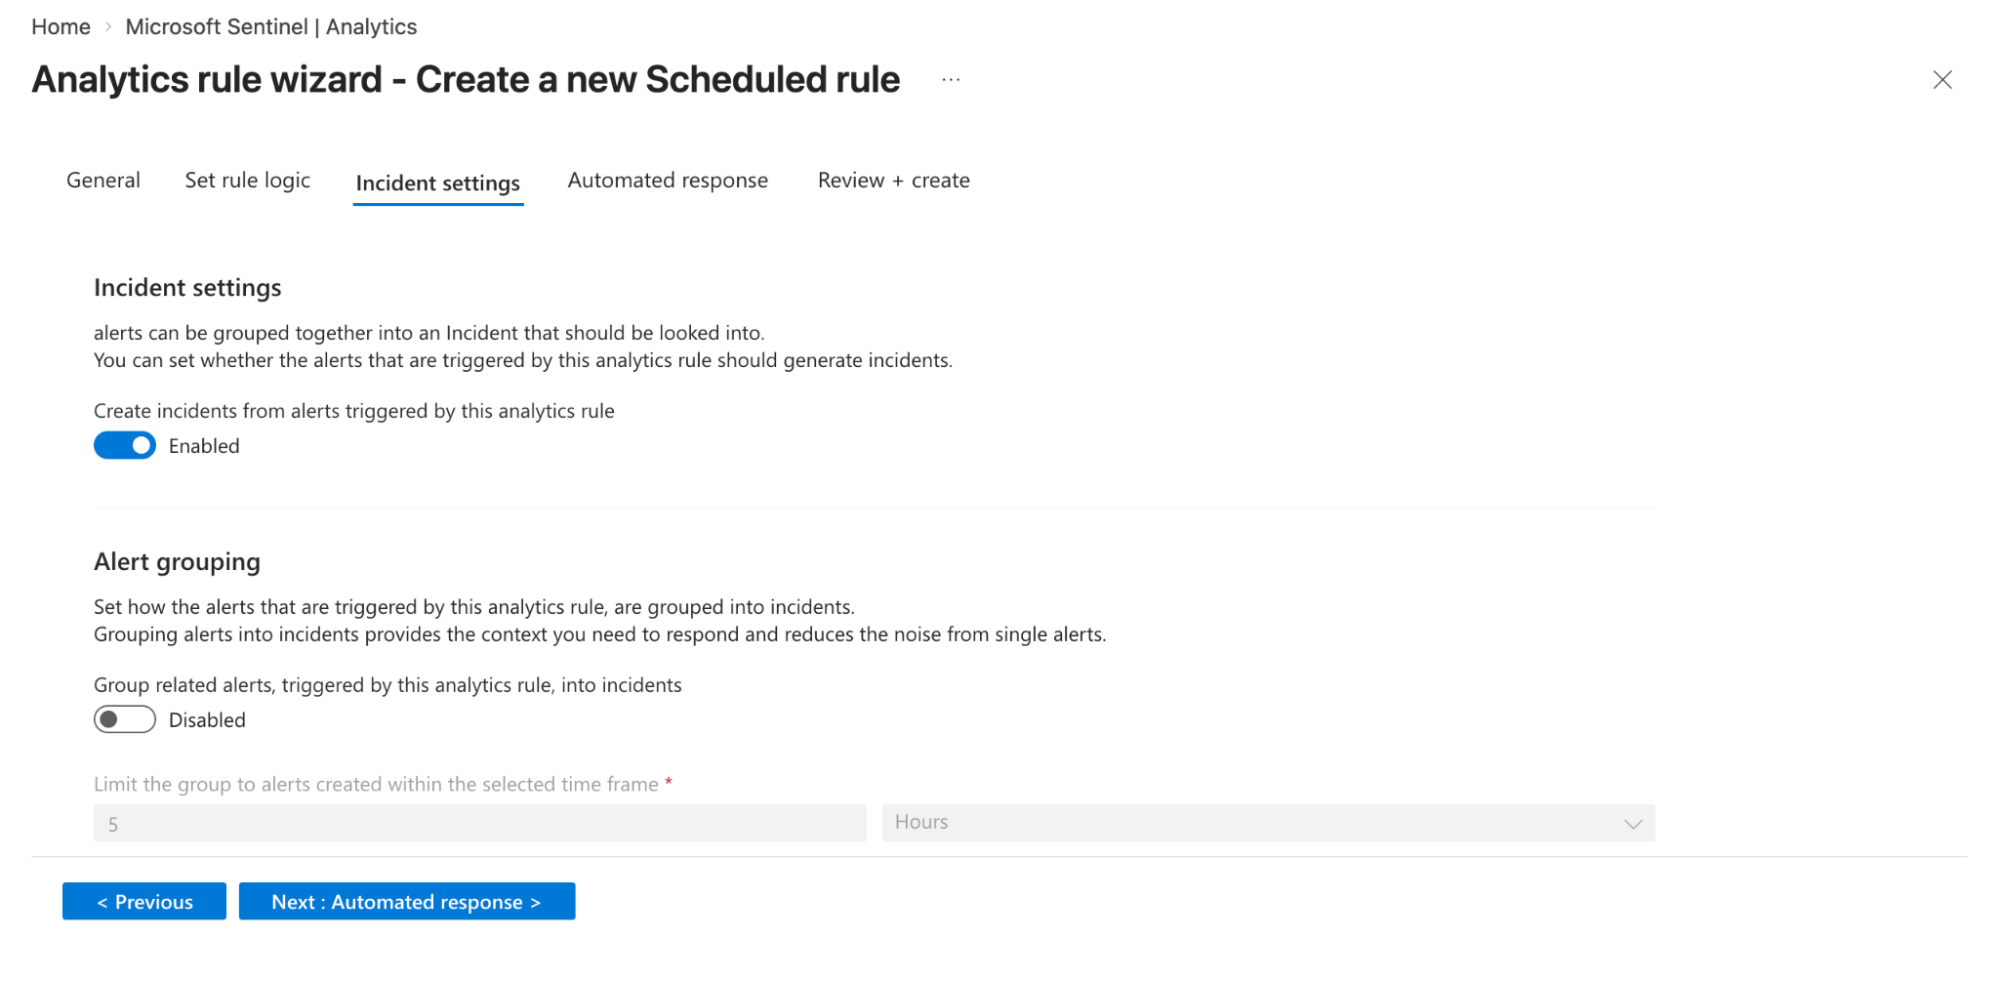
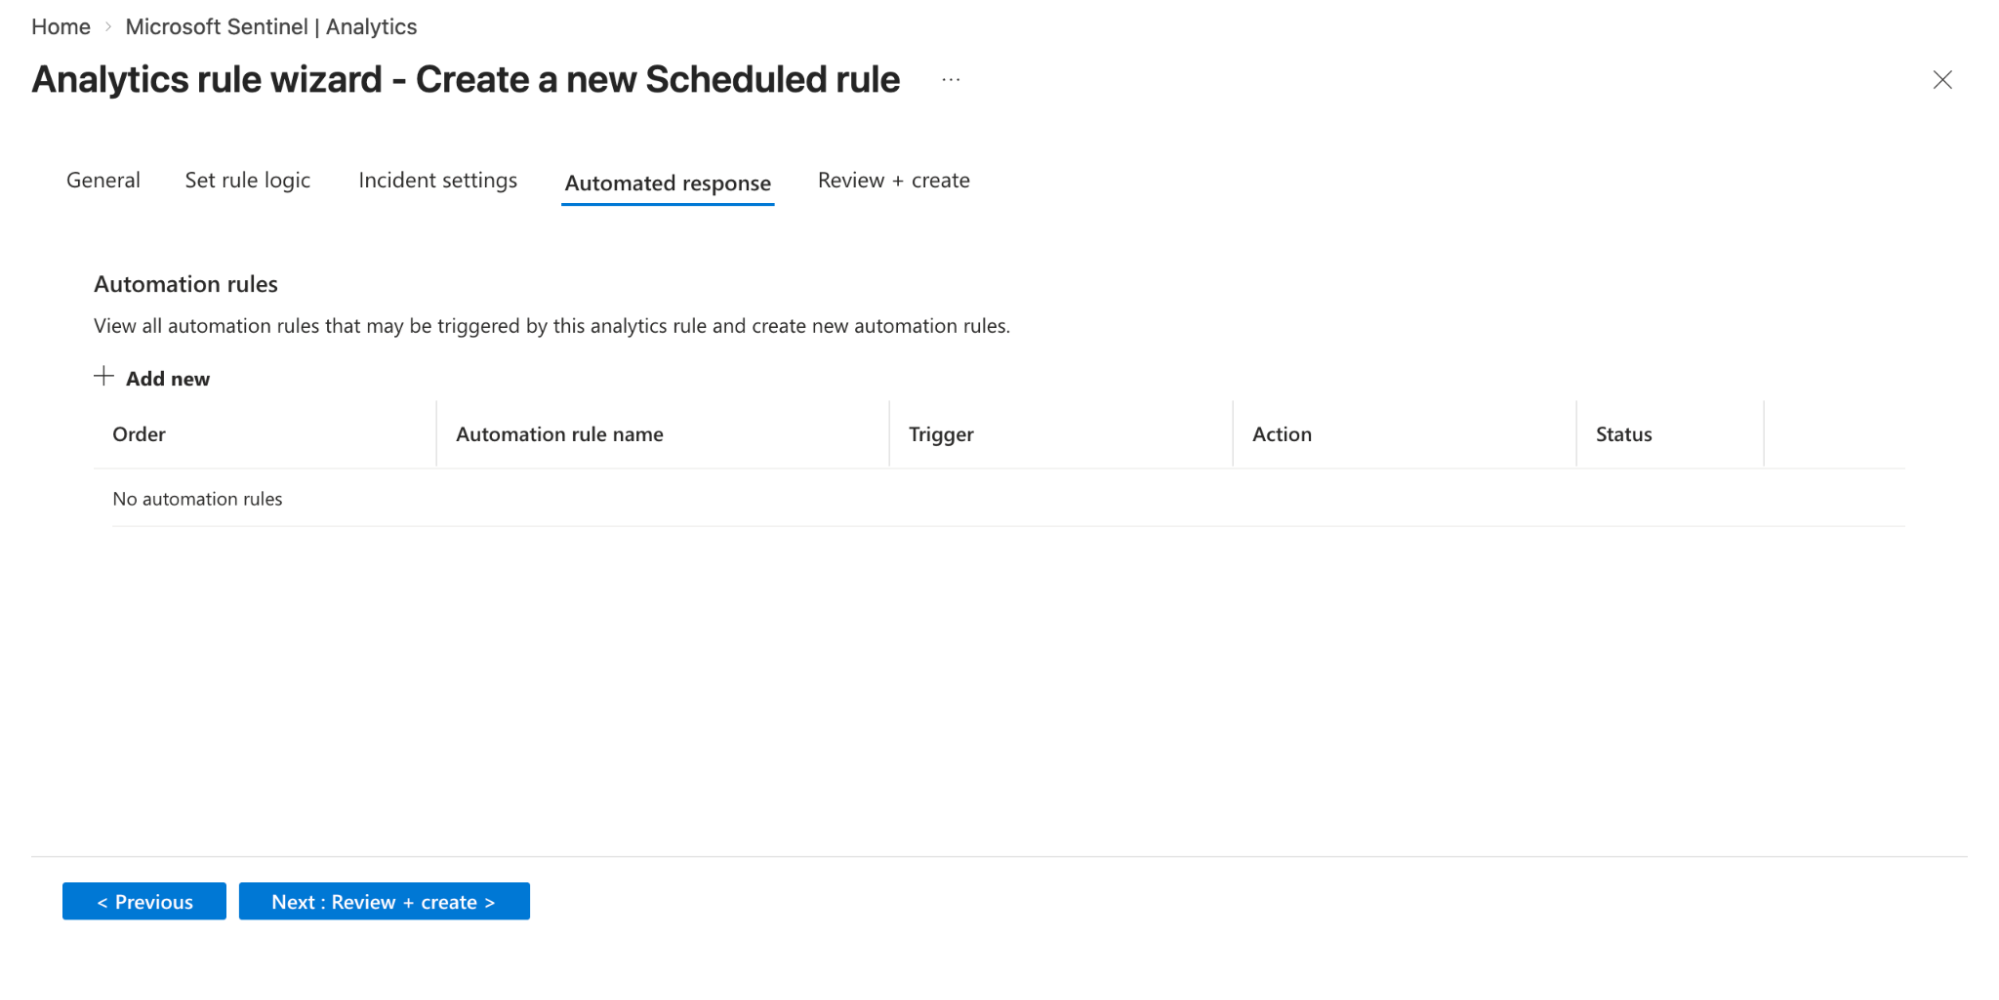
- Automation rules
- Attach automation rules or playbooks (Logic Apps) to trigger actions such as blocking IPs, sending notifications, or enriching alerts. You can define conditions, triggers, and execution order for these automated responses.
- Click on the Save option.
Note: You can adjust the Schedule and Lookup durations as needed.
Understanding the Output
Every result surfaced by this query carries a severity verdict. The table below defines what each verdict requires from the analyst:
| Severity | What It Means |
|---|---|
| P1-HIGH | A known malicious IP has successfully authenticated. Treat it as an active compromise. Immediately revoke the session, reset credentials, and isolate the endpoint. |
| P2-MEDIUM | A suspicious or unknown IP address has been successfully authenticated. Investigate the account and session immediately. |
| P2-MEDIUM | A malicious IP is actively attempting to authenticate. Your organization is being specifically targeted. Review and consider blocking. |
| P2-LOW | A suspicious IP is actively attempting to authenticate (failed attempt). Monitor for patterns and consider blocking if repeated. |
| P3-INFO | No threat indicators matched, or unclassified activity. Log for correlation with other events. |
Benefits for the SOC Team
| Benefit | Detail |
|---|---|
| Distinguishes Targeted vs Opportunistic | Separates mass spray attacks from IPs specifically probing your organization's identity infrastructure. |
| Catches Compromises Standard Logs Miss | A successful login from a scanner IP looks normal in raw auth logs. GreyNoise context makes it immediately visible. |
| Clear Severity Triage | P1-CRITICAL, P1-HIGH, P2-MEDIUM verdicts tell analysts exactly what to work on first — no interpretation required. |
| Earlier Intervention | Failed auth attempts from flagged IPs are surfaced before a successful compromise occurs. |
Updated about 1 month ago