
Sensor Management
The Sensors page is your central fleet dashboard. It provides a map view and a table of all deployed sensors, with controls for monitoring and administering them.
Fleet Map View
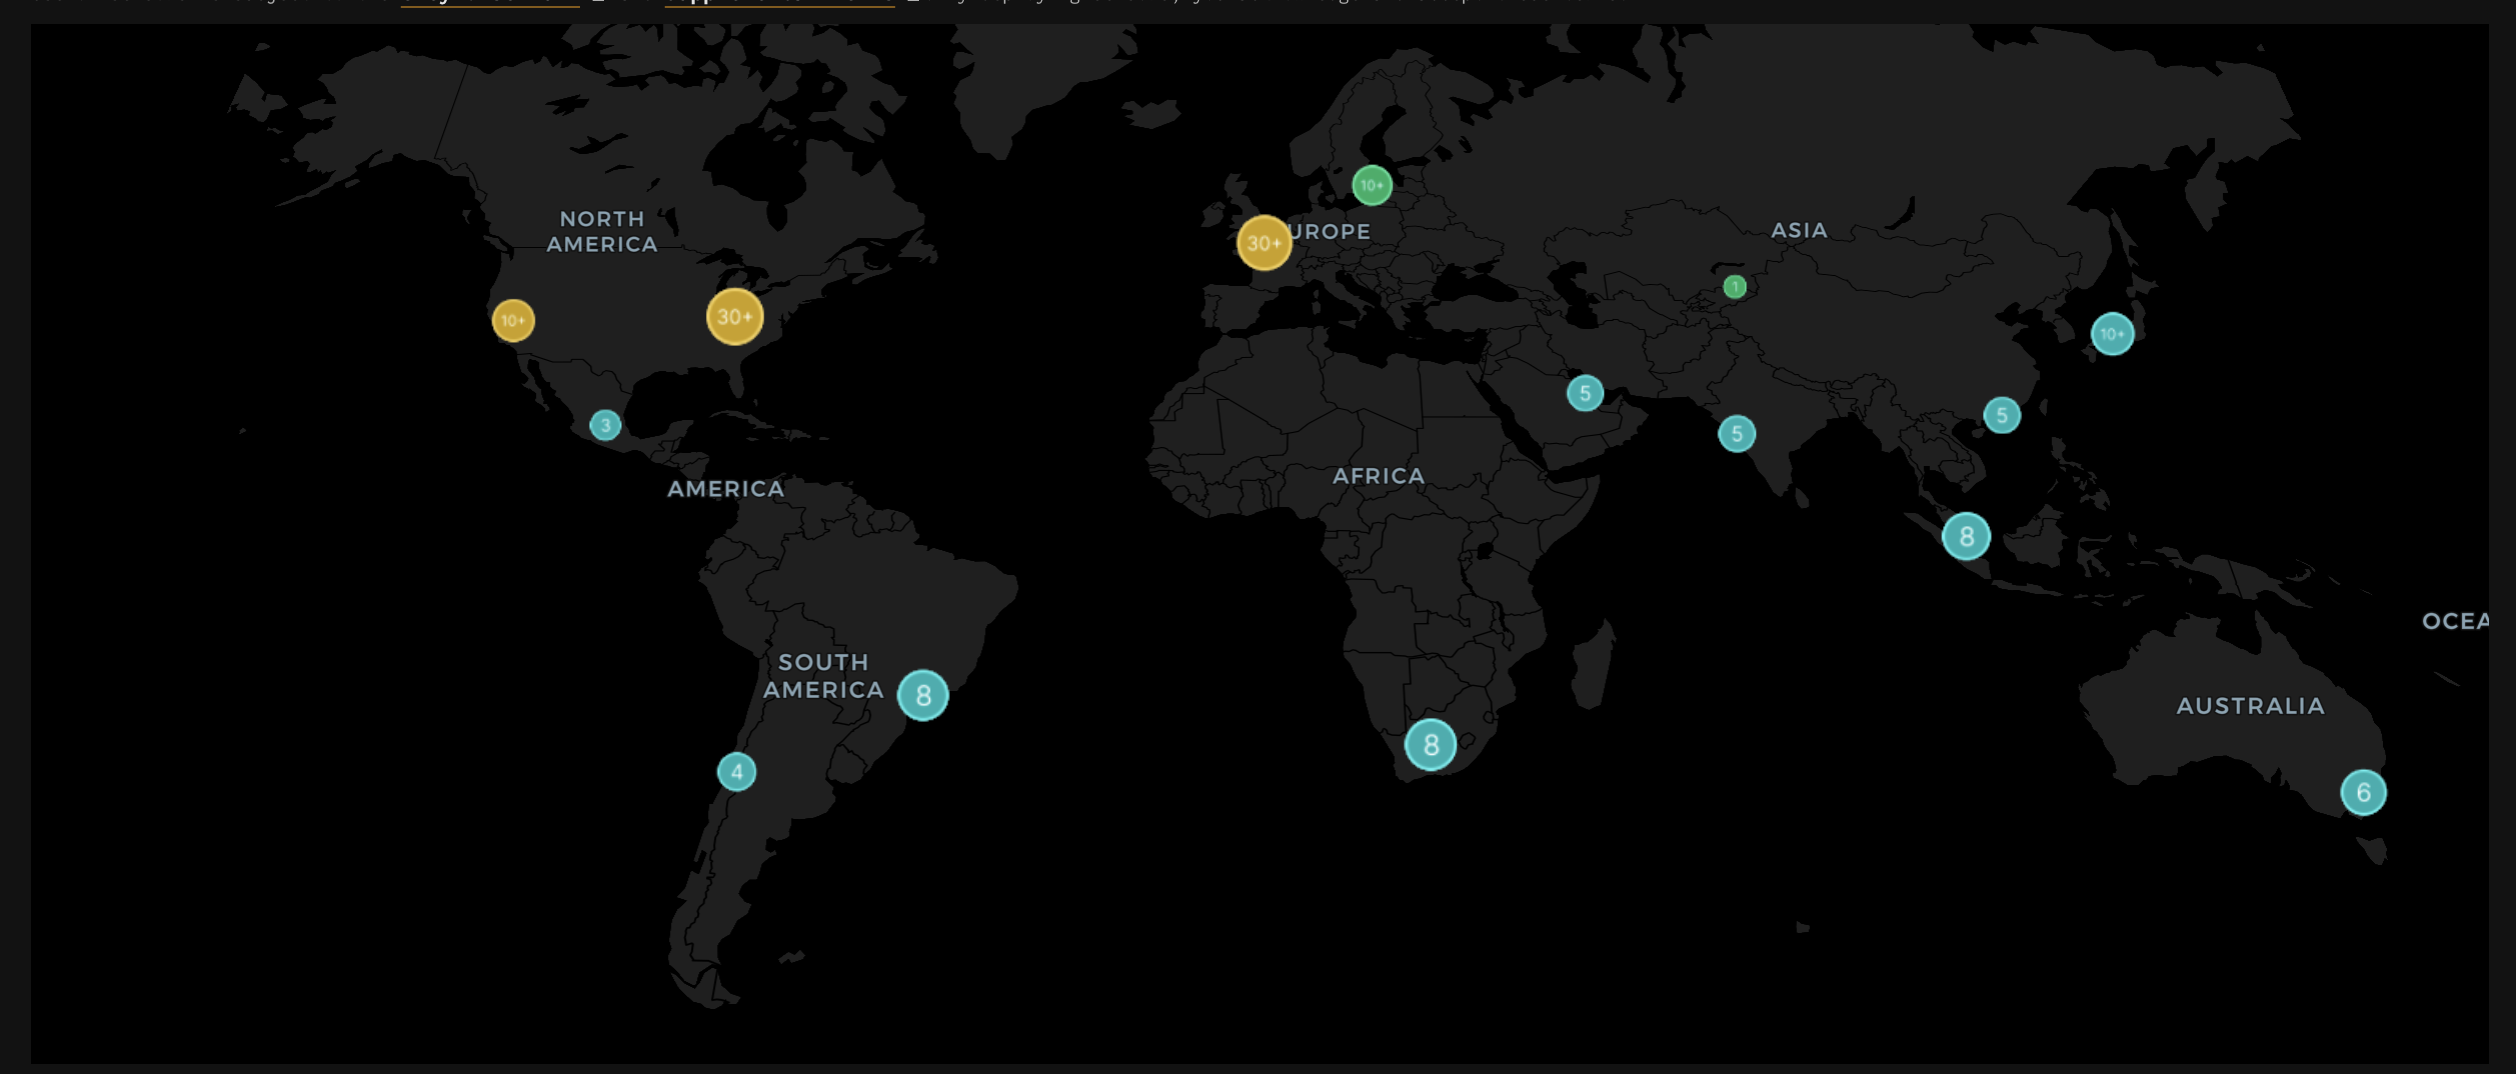
The world map at the top of the Sensors page shows your sensors clustered by region. Color indicates sensor health status:
- Green: Sensor is active and collecting data normally. All sensors in cluster are healthy.
- Red: Sensor is offline or misconfigured. All sensors in cluster are unhealthy.
- Yellow: At least one sensor in the cluster is unhealthy.
- Teal: The sensor is connected, but the GreyNoise health agent is not installed — if connectivity issues arise, diagnostic information will not be available.
Click Hide Map to collapse the map and show more of the sensor table.
Sensor Table
The table below the map lists all sensors with the following columns:
| Column | Description |
|---|---|
| Name | Auto-generated name (e.g., “BodzinMania”). Click Edit Name on the detail page to rename. |
| IP | The public IP address of the sensor host |
| Port | The SSH management port assigned post-installation |
| Country | Geographic country of the sensor based on IP geolocation |
| Current Profile | The deception profile currently active on this sensor |
| Status | Health state: Healthy, Unhealthy, or Connected |
| Actions | Click View to open the Sensor Detail page |
Filtering and Search
- Use the "Search Sensors…" box to filter by sensor name, profile name, or IP
- Filter by Country using the country dropdown
- Toggle between Enabled and Disabled sensors using the status toggle
- Use Export to download your sensor list
Sensor Detail Page
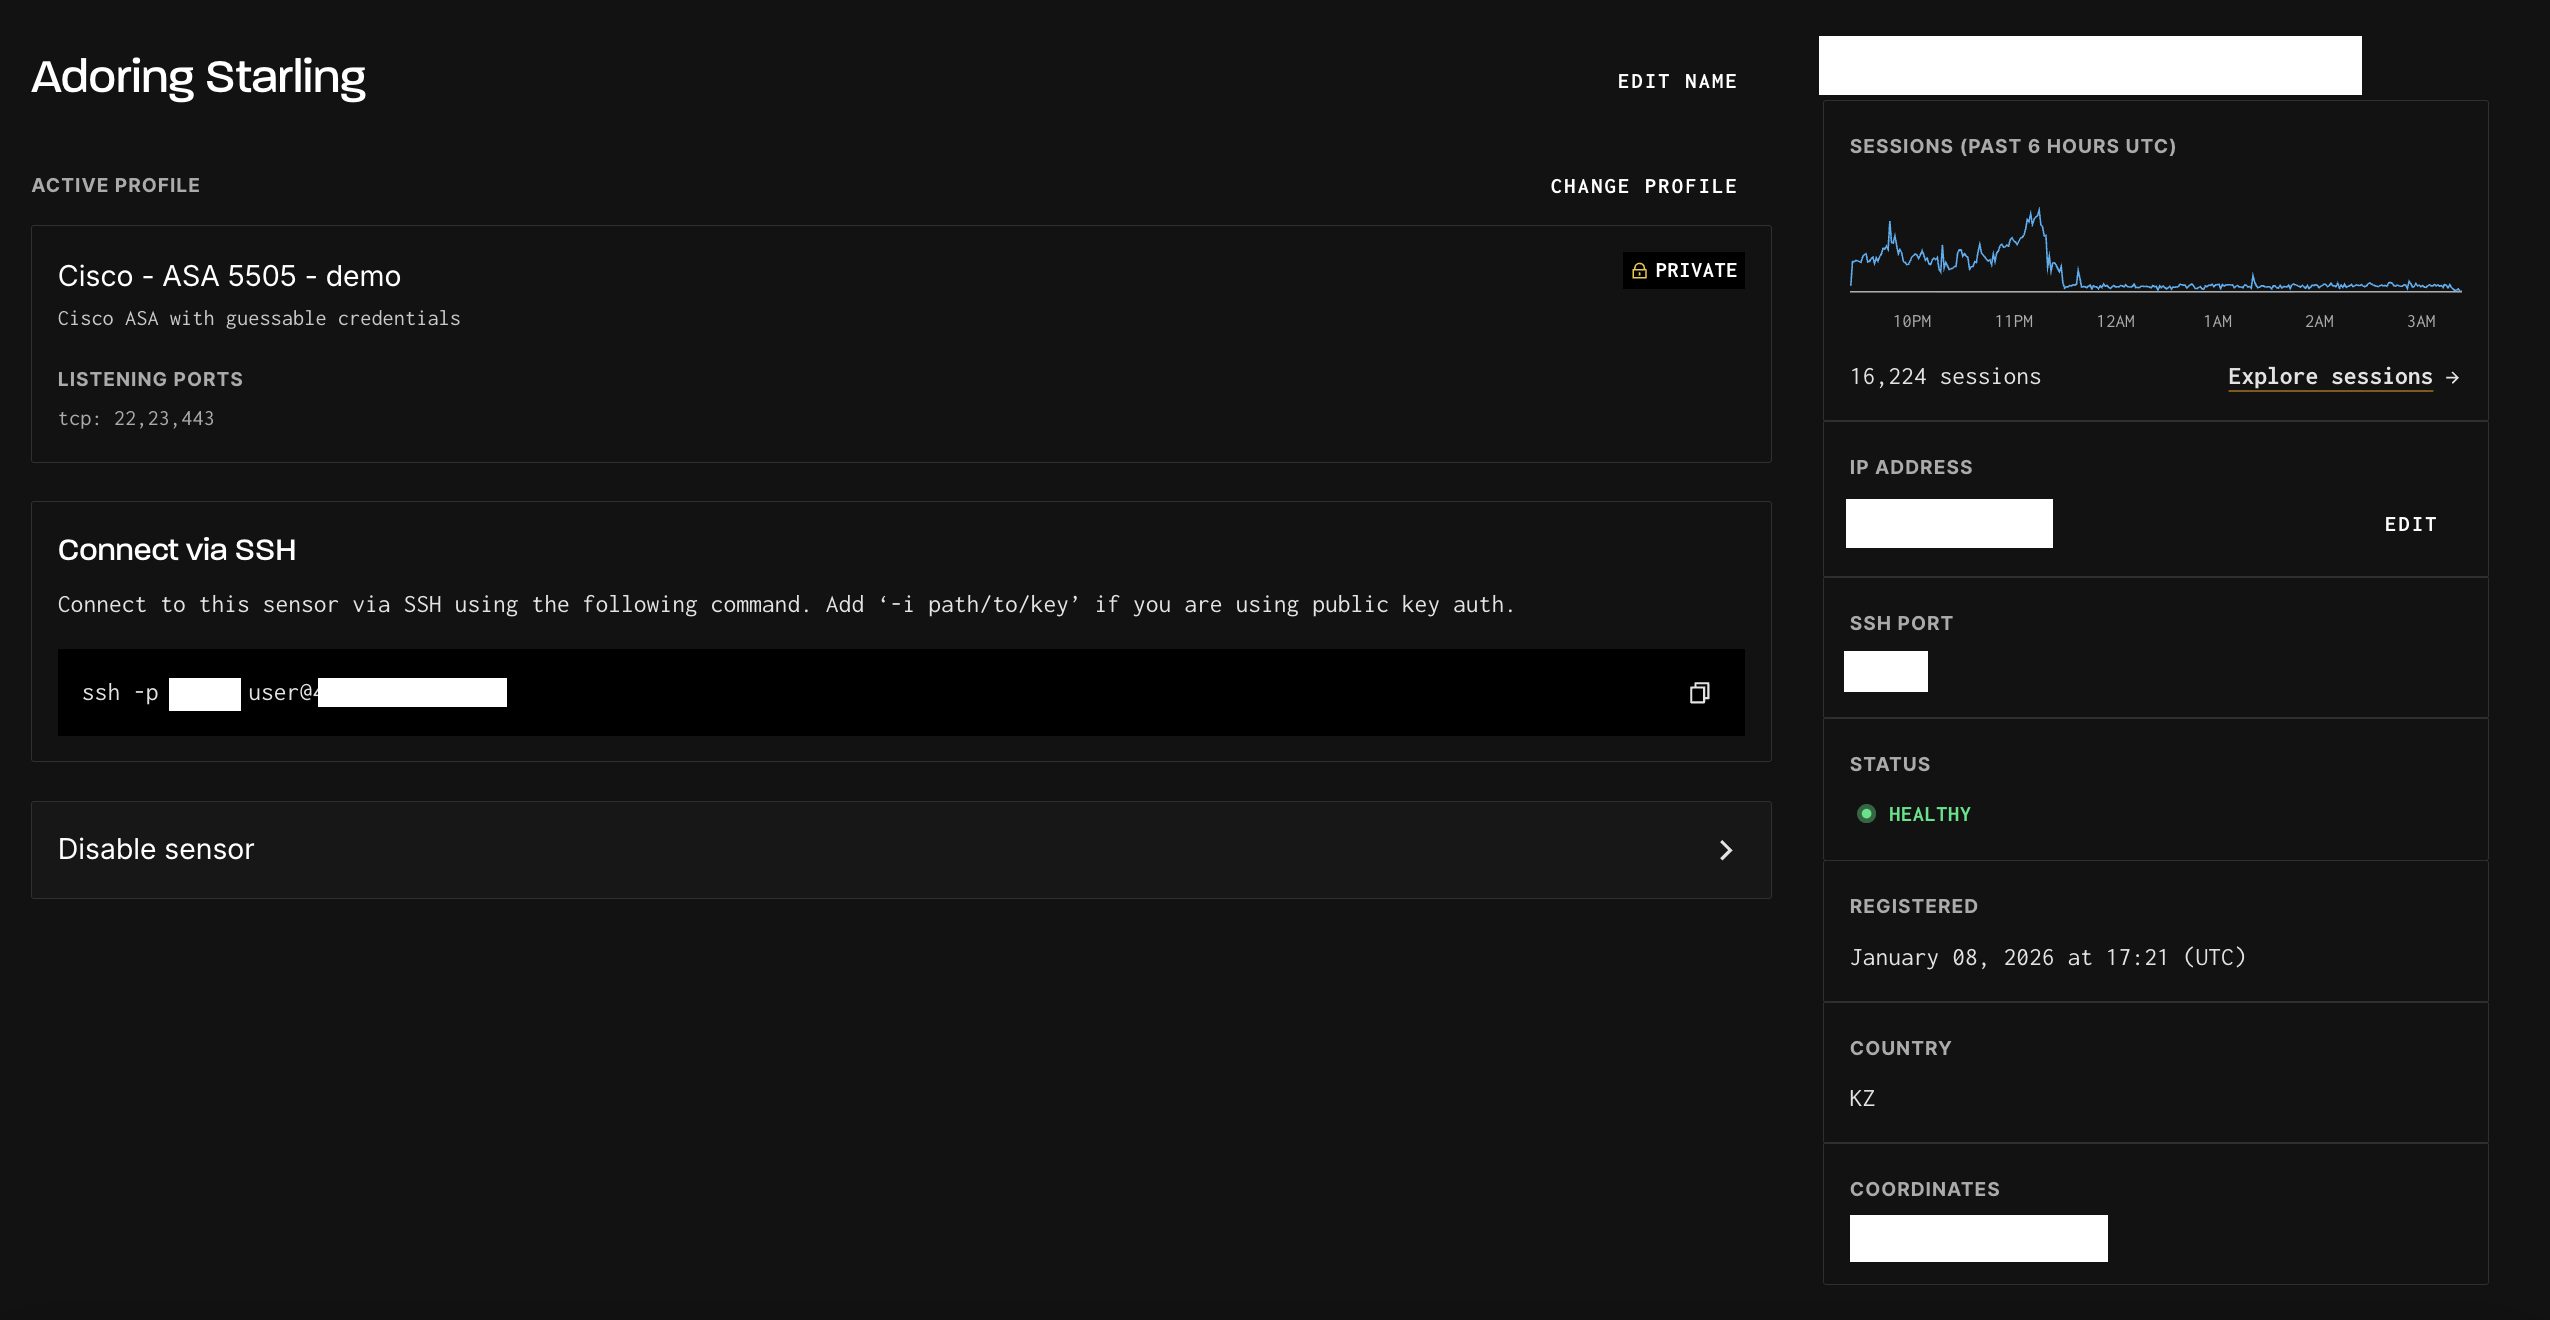
Click View on any sensor to open its detail page. From here you can:
- Monitor session activity over the past 6 hours
- Edit your sensor name
- See the sensor’s IP address, SSH port, registration date, and coordinates
- Edit the IP address if it changes (static IP strongly recommended)
- Change the active deception profile via Change Profile
- Reconnect via SSH using the pre-populated command shown on the page:
ssh -p <your-ssh-port> user@<your-sensor-ip> - Expand the Disable Sensor section at the bottom of the page and click DISABLE SENSOR to remove the sensor from the GreyNoise Sensor Cloud.
- Note: Disabling a sensor does not decommission the underlying server — you will need to do that separately using your standard server process.
Status Reference
| Status | Meaning |
|---|---|
| Healthy | Sensor is active and collecting data normally |
| Unhealthy | Sensor is offline, misconfigured, or not reporting |
| Connected | The sensor is connected, but the GreyNoise health agent is not installed — if connectivity issues arise, diagnostic information will not be available. |
Sensor Outbound Traffic
By default, the profile mapped to your sensor accepts inbound connections and responds to them, but cannot open new connections of its own. Enabling outbound traffic additionally lets that profile open new connections to the internet.
This is a per-sensor setting. Enabling it on one sensor has no effect on the rest of your fleet.
Why enable outbound traffic
An attacker who compromises a high-interaction (vulnerable) profile expects the host to be able to reach the internet. Their next steps almost always depend on it: downloading a second-stage payload, pulling tooling from a staging server, resolving a domain, or checking in with a command-and-control server.
With outbound traffic disabled, those steps fail and the session ends early — you see the exploit and little else. With it enabled, the attacker keeps going, and you capture the full post-compromise sequence: the endpoints they pull malware from, the commands they run, the files they drop, and the SHA256 hashes you can hunt for in your own environment.
This is what populates the Tactics page.
Outbound traffic alone is not enoughPost-compromise data only exists if a profile can actually be compromised. To see results in Tactics you need both outbound traffic enabled and a vulnerable (high-interaction) profile assigned to the sensor. Shallow and medium-interaction profiles are not expected to be compromised, so they produce little or no Tactics data no matter how outbound traffic is configured. See Profiles for interaction levels.
Risks to understand first
Enabling outbound traffic accepts additional risk, and the interface asks you to acknowledge it explicitly.
- Your sensor host is never compromised. Profiles run in the GreyNoise cloud, not on the machine you installed the sensor on. That machine only forwards traffic over an encrypted tunnel.
- Outbound traffic is attributed to your sensor's IP address. Outbound connections a compromised profile makes appear to come from your sensor's public address.
- Abuse activity performed by a compromised profile is attributed to your sensor's public address. If a profile is compromised, its outbound activity can draw complaints from your ISP or hosting provider and can affect the reputation of the address.
- GreyNoise watches for this. GreyNoise monitors sensor outbound traffic for anomalous behavior and may rotate a compromised profile host. If GreyNoise receives an abuse complaint from one of our infrastructure providers, we will rotate the profile host mapped to your sensor to prevent further abuse.
Review your hosting provider's acceptable use policy before enabling, and read Managing abuse reports for how to respond if you receive a complaint directly.
Enabling outbound traffic
- Go to Observe → Sensors and click View on the sensor you want to change.
- Find the Outbound Traffic card in the sidebar. It shows the current state, Enabled or Disabled.
- Click Edit.
- Select Internet outbound traffic.
- Read the risk notice, then check I understand the risk of enabling outbound traffic on this sensor.
- Click Save.
The acknowledgement is required for every sensor — saving will not go through until you check it. If you switch back to No outbound traffic and then to Internet outbound traffic again, the acknowledgement resets and you will need to check it once more.
Disabling outbound traffic
Follow the same path, select No outbound traffic, and click Save. Disabling requires no acknowledgement and is always available, even if your workspace later loses access to the feature — a sensor can always be reverted to inbound-only.
Disabling outbound traffic is also the fastest way to halt activity from a profile you believe is compromised. Reassigning the sensor to a non-vulnerable profile has the same effect.
When the change takes effect
Outbound access is applied to a profile host when that host is created, so changing this setting on a sensor with a profile assigned causes GreyNoise to replace the profile host serving it. Expect a short gap in collection for that sensor while the replacement comes up. Your sensor itself stays online and registered throughout — nothing needs to be reinstalled or reconnected.
If the sensor is still on the staging profile, the setting is saved and takes effect when you assign a profile.
If you don't see the Outbound Traffic card
- The card only appears for workspaces entitled to it. If you believe you should have access, contact [email protected].
- It is not shown on disabled sensors. A disabled sensor is not available for configuration. The sensor host must be re-registered as a new sensor.
Updated 2 months ago